
This post may contain affiliate links, meaning, at no additional cost to you, I will earn a commission if you click through and make a qualifying purchase.
A quick note to my readers:
It’s been a rough 2020. I’ve had a hard time getting myself to write about anything since April. It felt off to share about saving money with DIY home and garden projects when the news makes what I do feel so trivial.
But then I noticed that while I was moping around, I had nearly doubled my email subscribers. (What?!) And it got me thinking.
Being thrifty and green makes me really happy and keeps me optimistic.
So it probably makes many of you feel the same way.
Since we could all use a little more optimism these days, I want to do my best to help with that– Frugal Thumb style! So I’m jumping back into sharing about “being thrifty and green simultaneously.” Truly, thank you so much for your interest in Frugal Thumb!
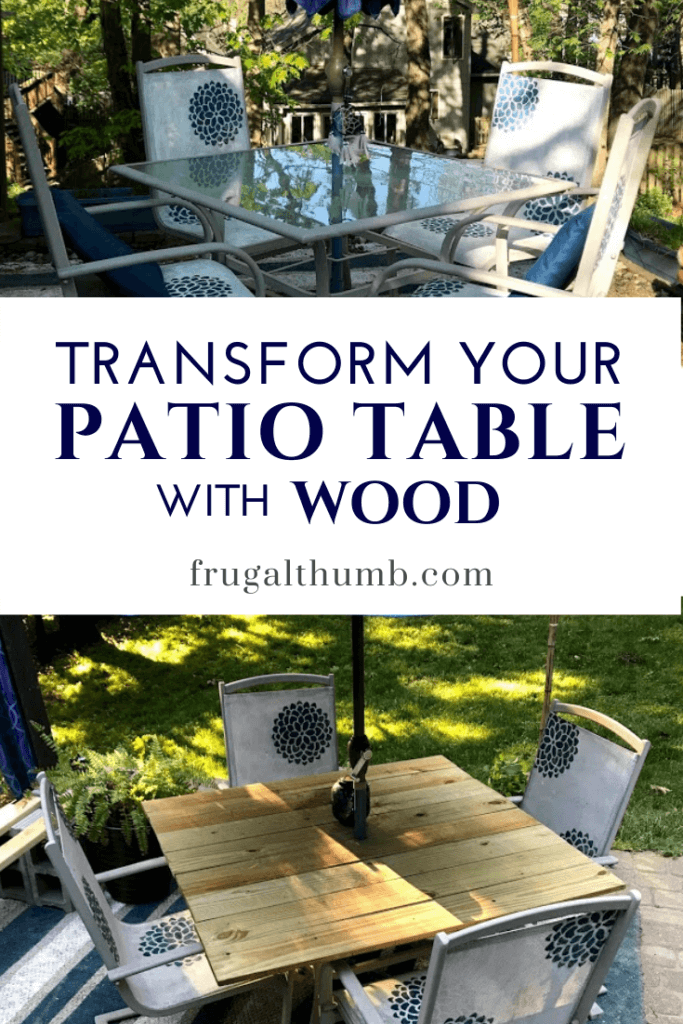
Today’s thrifty and green topic is how to transform an old patio table frame with some wood.
How It’s Thrifty: You are saving money by not buying a new patio table. Instead, you can make your table look great with a wood patio table top for less than $40. You’d probably have to pay more than that just to have someone haul it away!
How It’s Green: You are reusing your old patio table frame, easily updating it in less than one afternoon, and keeping it from ending up in the dump.
This project was inspired by my own unfortunate patio table accident. I was setting up our old patio table furniture outside in the spring. When I tried to put the patio umbrella through the hole in the middle of the table, I lost my footing. Because the umbrella pole was only partway in, it fell sideways. The glass top couldn’t handle the pressure and, as a result, shattered into millions of tiny pieces.
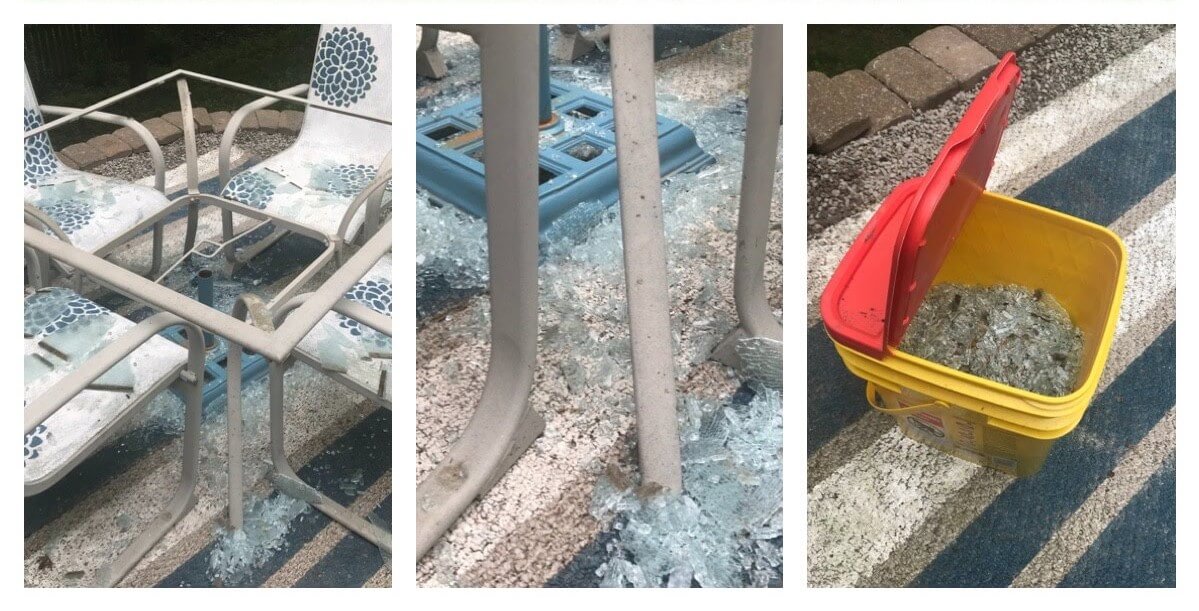
The broken glass was a bear to clean up, but it now lives in one of the old plastic kitty litter tubs that I keep handy for random odd jobs.
Fun fact: A newly shattered glass patio table makes crackling noises for a few minutes afterward. Check out the video that I shot below.
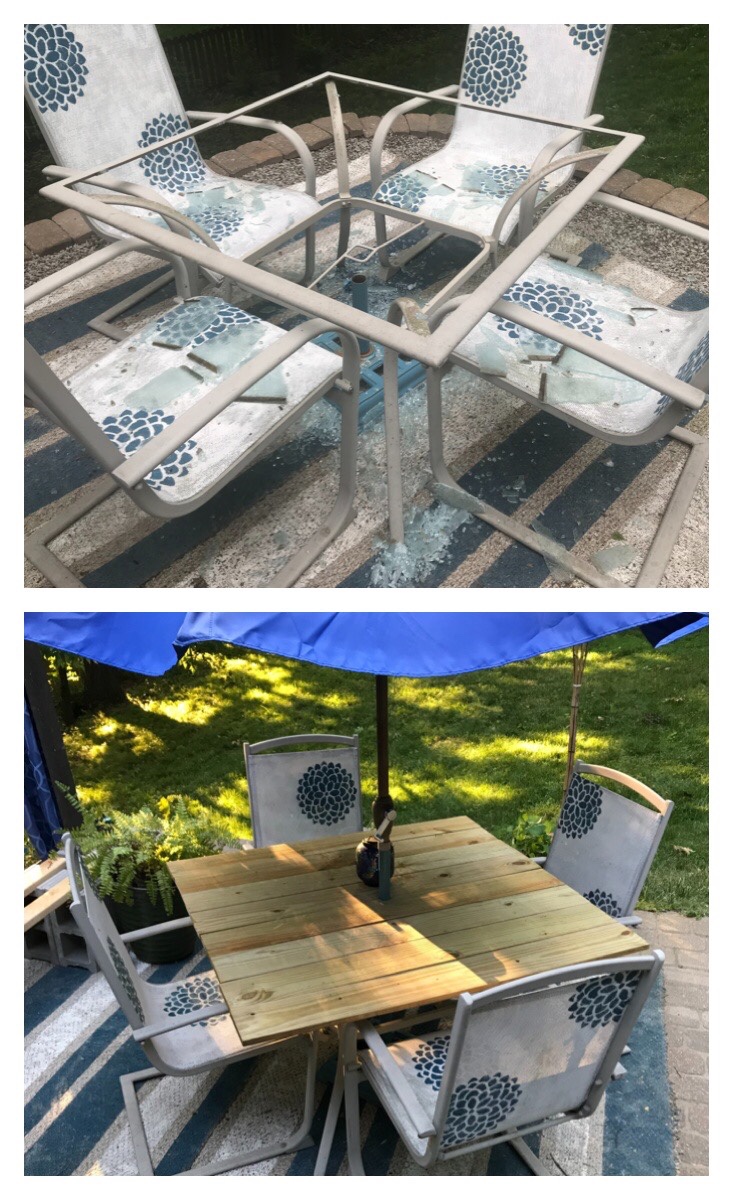
So, after I accidentally shattered my patio table, I didn’t throw it away. Nuh uh!!
I kept the frame and made a new top.
And guess what? I like it better than before!
Note: You don’t have to have to shatter your existing table top to take on this project. Even if you’re just wanting a new look for your table, you can use these instructions to do it.
At the cheap end of the spectrum, a new patio table would have cost us over $100, but I was able to build a new top for less than $40. Bonus: I got to feel good about saving the old frame from the trash heap and have fun doing a DIY project.
Not only did I end up with a nice looking table but it’s also way easier to keep it looking clean (unlike the old glass top).
Read on to learn how to do it yourself.
Note: These instructions are for a 4’x4′ patio table. If you want to make a different size, you can simply modify these instructions to work for your patio table frame.
Tools
- Circular saw (for cutting the wood boards)
- Electric drill and round drill bit (for making the umbrella pole hole)
- Gloves
- Eye Protection
- Measuring Tape
- Pencil
- Paint brush
- Sand paper
Supplies (total cost: about $33)
- one 2”x4”x8’ board – about $4
- four 1”x6”x8’ boards – about $24
- pack of 2-inch nails – about $5
- Leftover paint – free
Prices listed are what I paid for supplies from Lowe’s.
Steps for making a wood patio table top
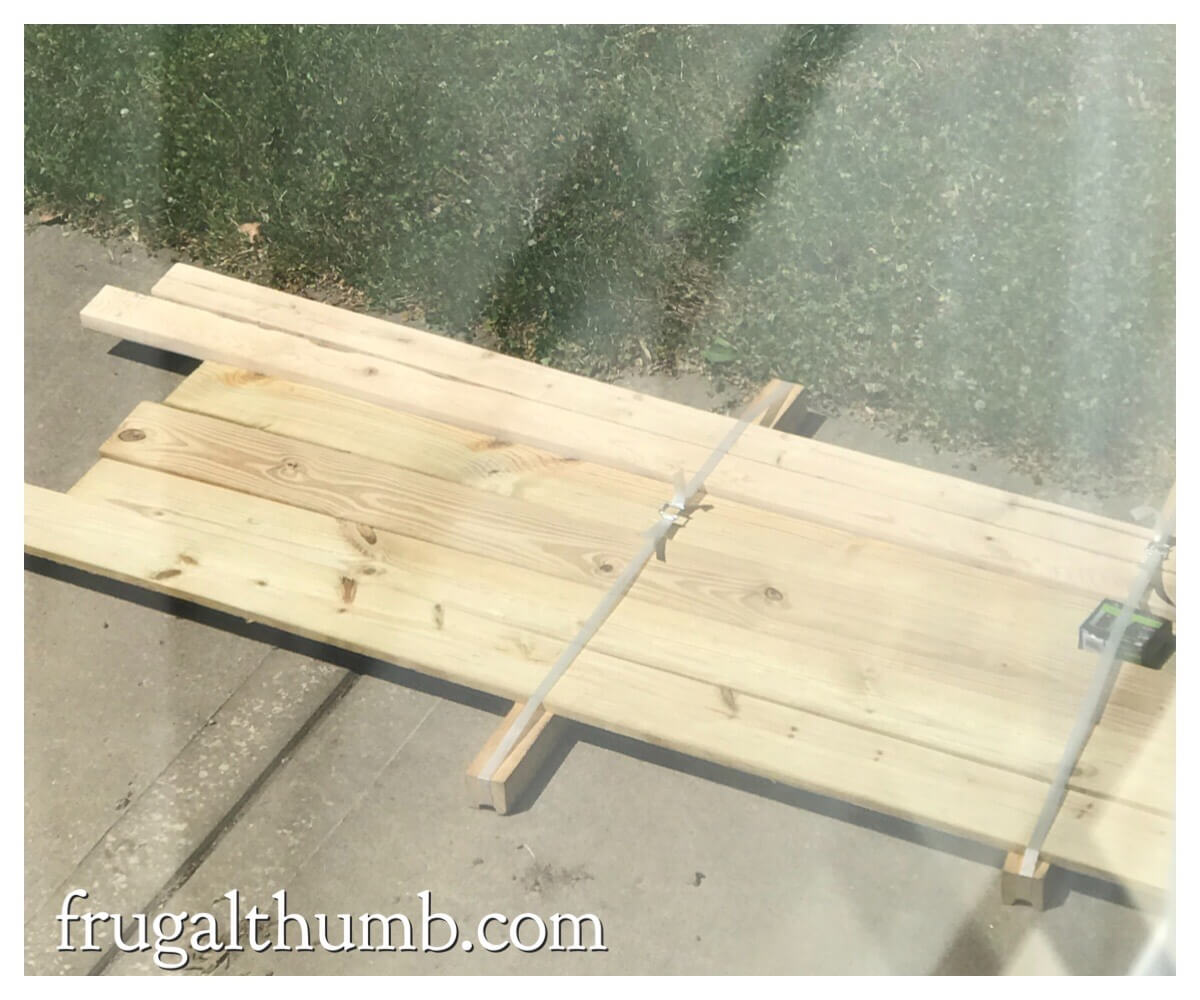
1. Cut the four 1″x6″x8′ boards in half.
These are going to form the top of your table. Mine weren’t exactly uniform to start with, so take the time to measure and get the lengths as similar as possible. I recommend using a circular saw for speed and ease. If you don’t have a saw horse to hold the boards steady while you cut, you can get creative like me–I use two empty plastic kitty litter tubs to hold my boards while I cut them.
2. Place the freshly cut boards side by side to make a big square.
At this point, take the time to make sure you like the arrangement. Check for knots, rough spots, and other imperfections. Once you’ve got the boards in an order that you like, move on to the next step.
3. Figure out the placement and size of the 2″x4″s needed under the table top.
The 2×4 is going to be cut into a couple of pieces and used to nail all the other boards together. But first, you need to know how long your two 2×4 pieces need to be under the table. To do this, flip the 1×6 boards upside down. You should now be looking at what will be the bottom of your new table top. Place your patio table frame upside down on top of the boards and center it. Then use a pencil to mark the boards inside of the old table frame on the two sides that crisscross the 1×6 boards. and measure the length of your markings.
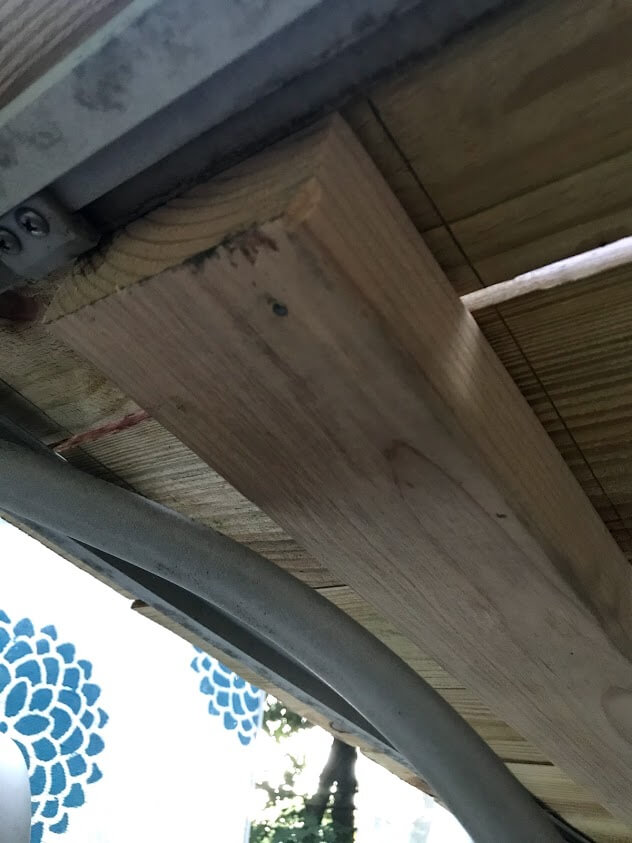
Frugal Thumb Tip: If your frame still has the original top and you’re just using these instructions to make a wood cover, you’ll need to mark the outside edge of the frame. OR If your frame has no top like mine but it has bars that might get in the way of laying the table top flat onto the frame once you’ve attached the 2x4s, just move your line a few inches in from the edge of the frame. That’s what I had to do on both sides. But it still fits snuggly on the ends. See picture below:

4. Cut the one 2″x4″x8′ board into two pieces at the length measured in the previous step.
These boards are going to hold the 1″x6″ boards in place and keep your wood table top from sliding when you place it on top of the old table frame.
5. Nail the 2x4s into place under the table top.
You want to put 2 or 3 nails into the 2x4s on each side to hold them in place. Don’t put a gazillion nails in just in case you have to redo it. Then test your 2×4 placement by making sure the edge boards of the new table top fits well on top of your patio table frame. To do this, remove the boards that aren’t nailed in place yet, lift up the outer pieces (easier as a two-person job) and set it on your frame. If it sits flat on top, you’re ready to nail some more. If not, check your markings, redo your nails, and test again.
Here’s a photo of the single nail on one side of the 2×4 under my table top, used to hold the 2×4 in place for testing:
Once satisfactory, flip all of the boards right side up again to finish nailing from the top of the table.
6. Nail the 2x4s into place from the top of the table top.
You’ll need 2 nails in each 1×6 board along both 2x4s.

Optional: Add a hole for an umbrella.
If you want your table to have a patio umbrella, find and mark the middle of the table. Then put a hole in it with the round drill bit.
I had to use our biggest round drill bit. It was just the right size to fit our umbrella pole.

At this point, your new wood table top just needs some finishing touches.
7. Sand the wood.
To prevent slivers from ruining your fun when you use your new table top, sand the wood until it feels smooth.
You can do this by hand with some sand paper or use an electric sander.
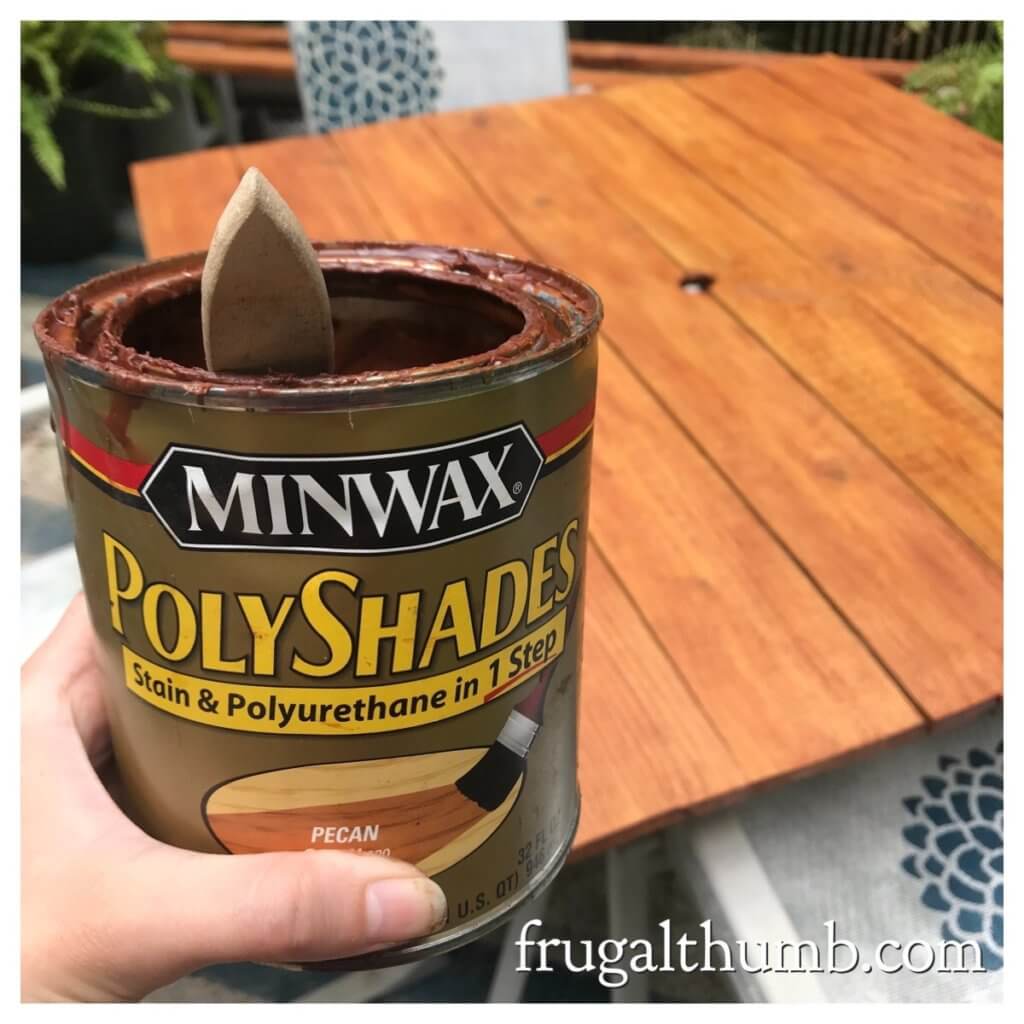
8. Paint the wood.
To keep the wood looking nice for longer and protect it from the elements, I recommend using some outdoor paint on it. You can be creative and paint it any way you want–stripes, patterns, stencils, etc.
I just used the last bit of an old can of stain/polyurethane that I had in the garage from a previous project (my farmhouse table).
9. Place the finished wood patio table top on the old frame.
Now that your wood table top is done, it’s time to put it on the frame for the last time (until you want to move it, change colors, or winter it over in your garage, of course).
10. Admire your wood patio table top!
Feel good about what you accomplished in your one afternoon of work. And go put your new wood table top to use.
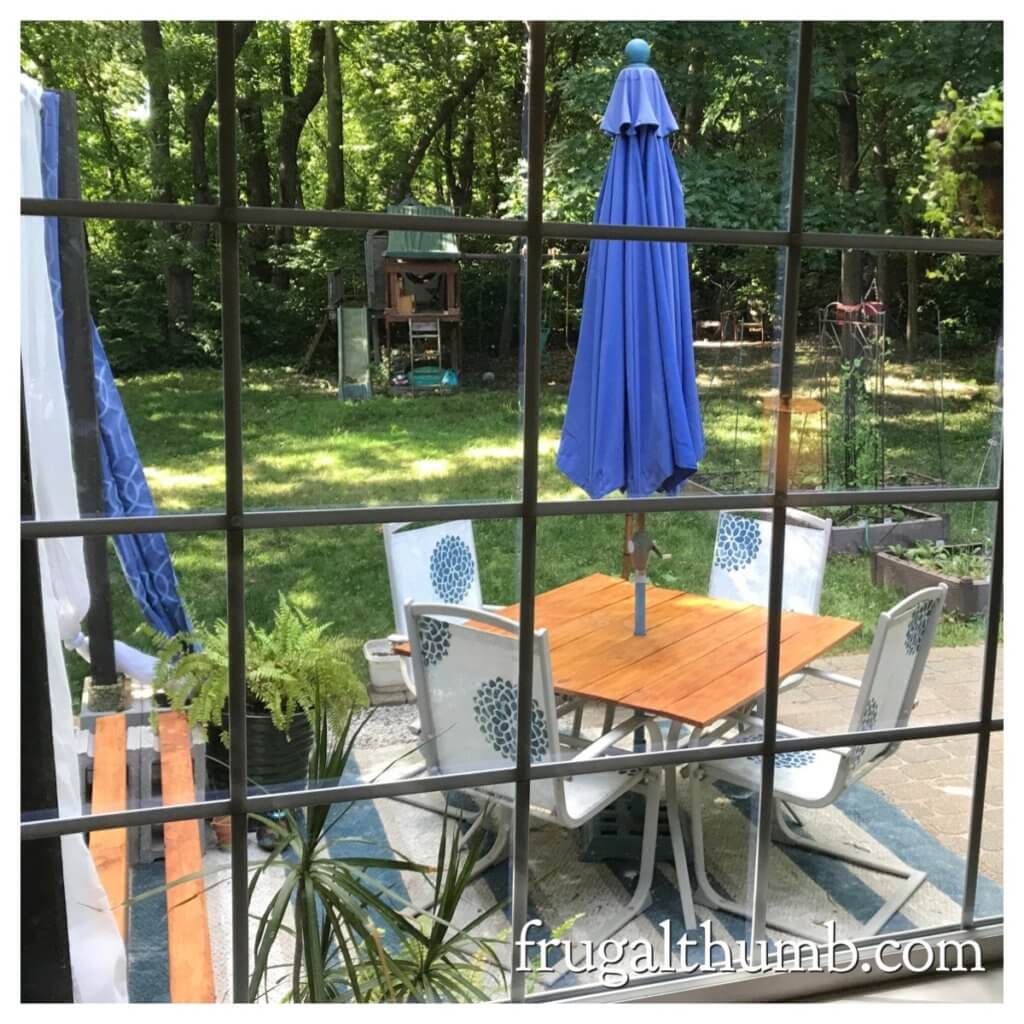
Mine happens to be within sight of our kitchen window and I get satisfaction just looking at it whenever I walk by.
As always, I hope this post has given you the confidence to try something thrifty and green.
If you give this wood patio table top DIY project a try, be sure to let me know how it goes! I love seeing before and after photos for DIY projects!
Yours frugally,
Joni ?