
This post may contain affiliate links, meaning, at no additional cost to you, I will earn a commission if you click through and make a qualifying purchase.
Do you have a messy home and need to get it guest-ready fast? When you’ve got visitors coming and only a few days to get your home looking presentable, you may feel a panic attack coming on!
Personally, I struggle to keep my home organized and can get tired just thinking about what needs to get done.
And when guests are coming, a million mostly negative thoughts start running through my mind.
Oh no! The house is a mess! What should I focus on cleaning? Where should I start?! Will my guests be secretly judging me for my messiness? Is there any way to cancel this visit and meet somewhere else?
That’s the worst feeling- when you’re too embarrassed to have friends and family over for a visit- or scarier, the thought of a surprise visit weighing on your mind!
Let’s banish those negative thoughts with a step-by-step daily guide to get your home guest-ready as quickly as possible with the least amount of effort.

Get your home guest-ready in just 1 hour a day, for 14 days
For the purpose of this post, I am going to assume you have 2 weeks before your guests will arrive and can squeeze in about 1 hour a day to declutter. I want this to be manageable for you! Feel free to do more or less each day depending on how much time you have before your guests arrive. For example, if they’re arriving in a week, try to fit in two hours per day leading up to their arrival or limit your time blocks to 30 minutes per area. Or, if you have 4 weeks, you can spend 2 hours on each area being extra meticulous on your cleaning. Do what works best with your schedule.
If you’re like me, you’re already busy and you have very little extra time in the day, so you’ve got to make sure what you’re doing is getting your home guest-ready in the least amount of time possible. If your guests will be arriving soon, you just want to get things presentable as quickly as possible without the worry of deep cleaning or super organizing everything.
So, here’s the most important thing you need to remember when preparing for your guests with this plan: focus on the areas your guests will see.
Focus on the areas your guests will see.
With this step-by-step guide, you’ll focus your energy on the most visible areas of your home to get it guest-ready in only 1 hour a day, for 14 days.
By cleaning the areas your guests will see, you are accomplishing the cleaning that will give you the biggest bang for your buck. You can always clean more if time permits, but start with what your guests will see because that’s the bare minimum needed. Bare minimum to be able to welcome guests without embarrassment- that’s what we’re after here.
Important Area Tips: If any of the rooms/areas that I lay out in this 14-day plan don’t make sense for your home, replace it with something that does. For instance, if your home doesn’t have a buffet table, use that block of time to go through a bookshelf that is visible to guests, or your mudroom/entryway area.
Focus for small manageable blocks of time.
I know you’re exhausted when you get home from work so this challenge breaks up the workload into small, manageable 1-hour blocks that you can conquer after the kids are in bed so you can get on with other things. Because, let’s face it, there are many days that’s the only time you have to get this cleaning done.
Important Time Tips: Set a 45-minute timer for each of these tasks so you know when it’s time to take a break and re-evaluate what’s left to do. If you’re done, great! Stop early and rest until it’s time to declutter the next day. If you’ve still got a lot to do, take the last 15 minutes of your hour and move any items/papers/piles that you cannot finish sorting to a place in your master bedroom to sort when you have extra time during the upcoming days.
Without further ado, let’s get your home guest-ready!
Step-by-Step Guest-Ready Guide
If you need a little more guidance on how to tackle clutter in the most efficient way possible, read my post: Use 5 boxes to sort and organize all of your clutter. Otherwise, let’s get started!
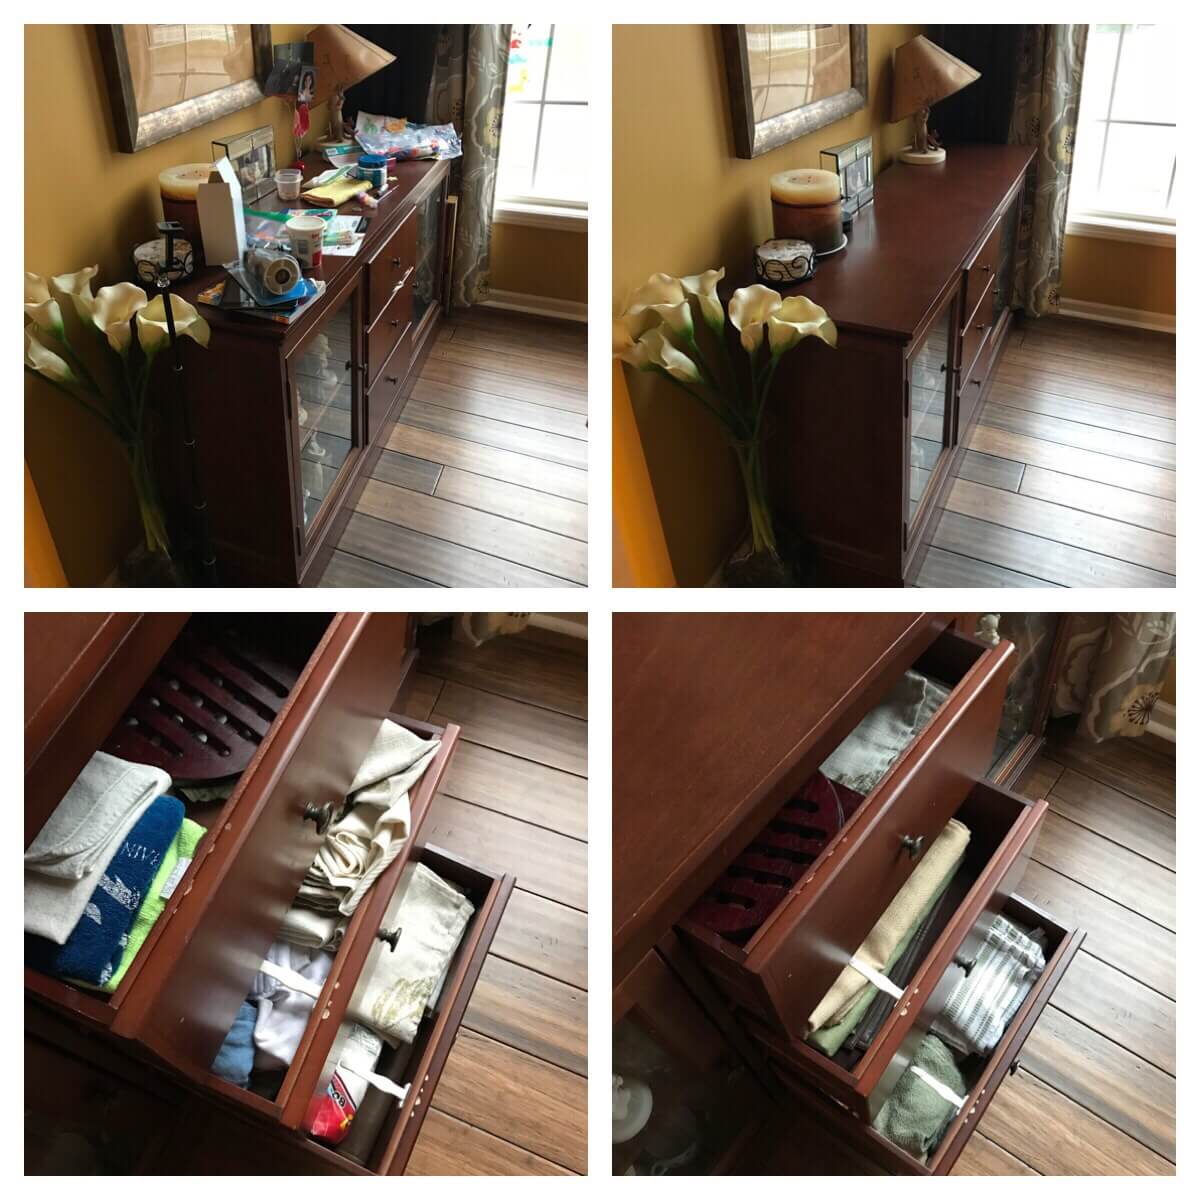
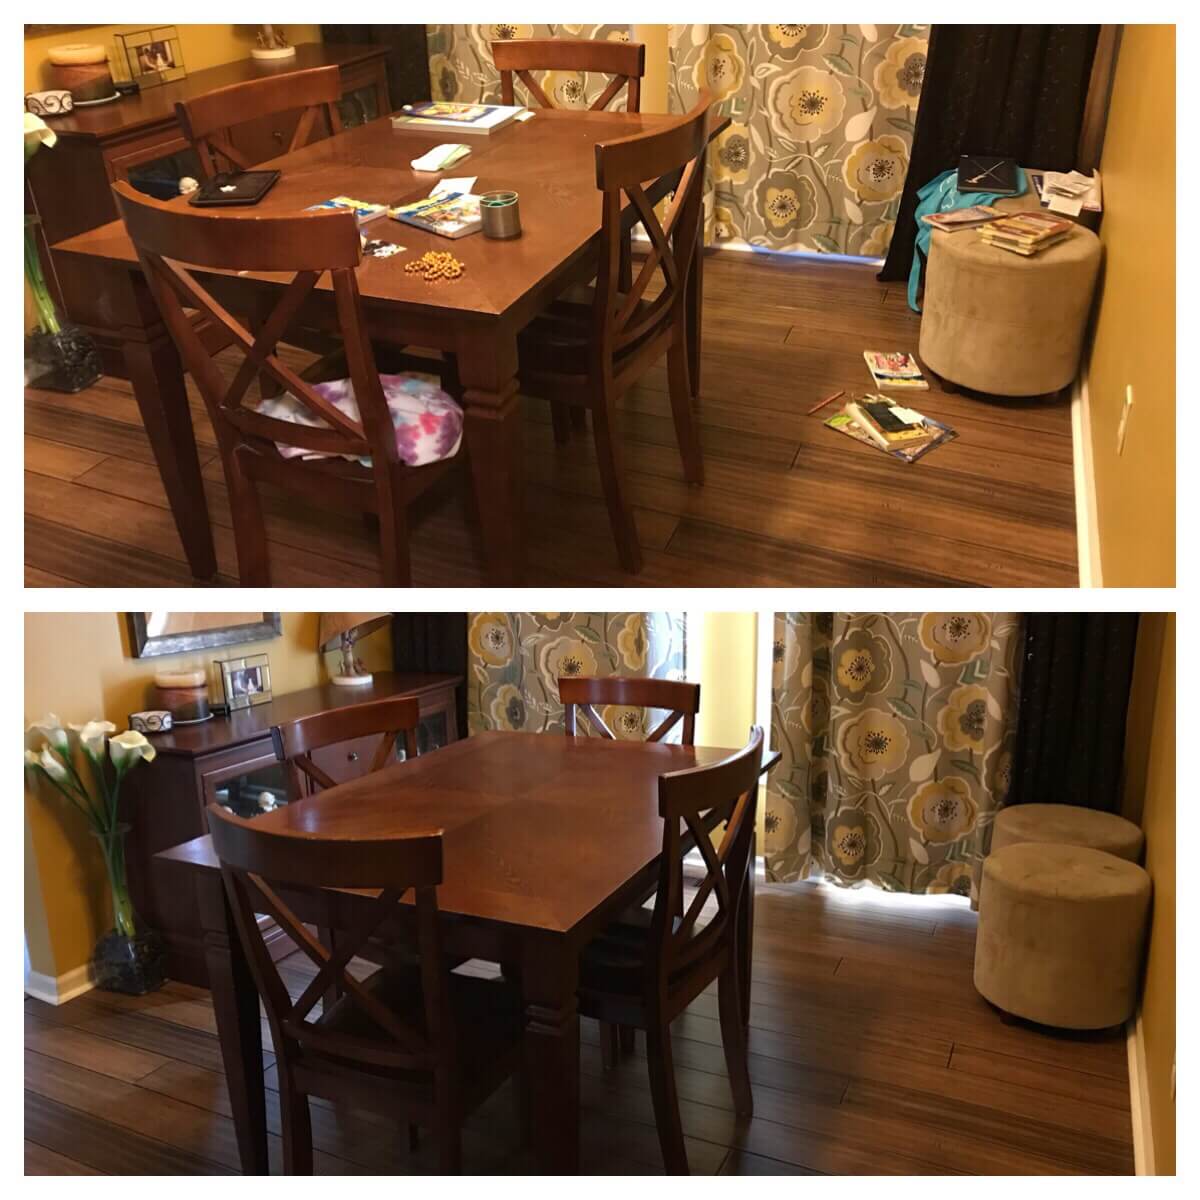
Dining room – 2 days
We are starting with the dining room since that is where you will be entertaining your guests during meal times. Many times, that is THE reason they’re visiting- for dinner. So we really want this space to be clutter-free.
Day 1: Declutter your buffet table.
Check your buffet table for clutter. Move any items that don’t belong and put away everything on the surface. You want it to be cleared and dusted so food can be set out as needed. Be sure to check the drawers too and reorganize as needed. Guests may get in there for extra napkins or trivets. Only include the napkins that you wouldn’t mind your guests seeing/using, and move any old rags. We keep our rags under the kitchen sink.
Day 2: Declutter your dining room table and chairs.
Check your dining room table for clutter. Make sure there is nothing except maybe a centerpiece on the table, and all chairs should be clear and usable- not piled with papers. Put everything away. Once this day is done, your dining room should be clutter-free! One room down! You’ve got this!
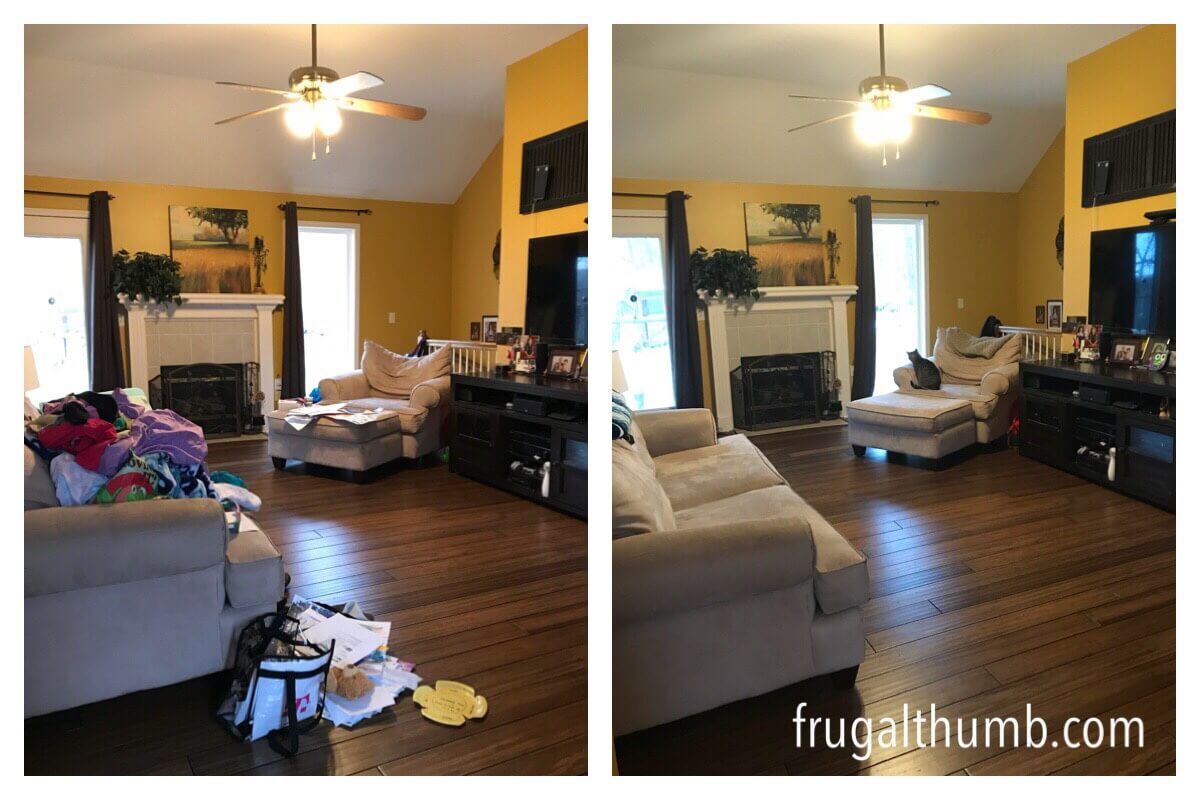
Living room – 4 days
Next, we will tackle the living room. This room may be where your guests spend most of their time during their visit if they’re coming over to watch a game or a movie.
Day 3: Declutter your entertainment center.
If you watch any tv with your guests, your entertainment center will be front-and-center. So you want to get rid of any clutter that may have collected on this. Any piles have got to go. Wipe it down to remove the dust.
Day 4: Clear couch/chairs.
Your guests should feel welcome to sit on any chair available in the living room. Make sure there are no papers, toys, laundry, etc laying on the chairs. Pillows and blankets are the only items allowed- and maybe a cat. 😉
Day 5: Look over the space and declutter anything that still needs decluttering.
Does your living room have a coffee table? Are there items on the floor? Take this 1-hour cleaning session to declutter the rest of your living room space. Now you’ve completed the decluttering process on 2 rooms! You’re doing great!
Day 6: Recheck areas from first 5 days.
Make sure the areas that you decluttered in the first 5 days are still decluttered. Put things away as needed. If you have extra time left in your 1-hour time block, enjoy the rest!
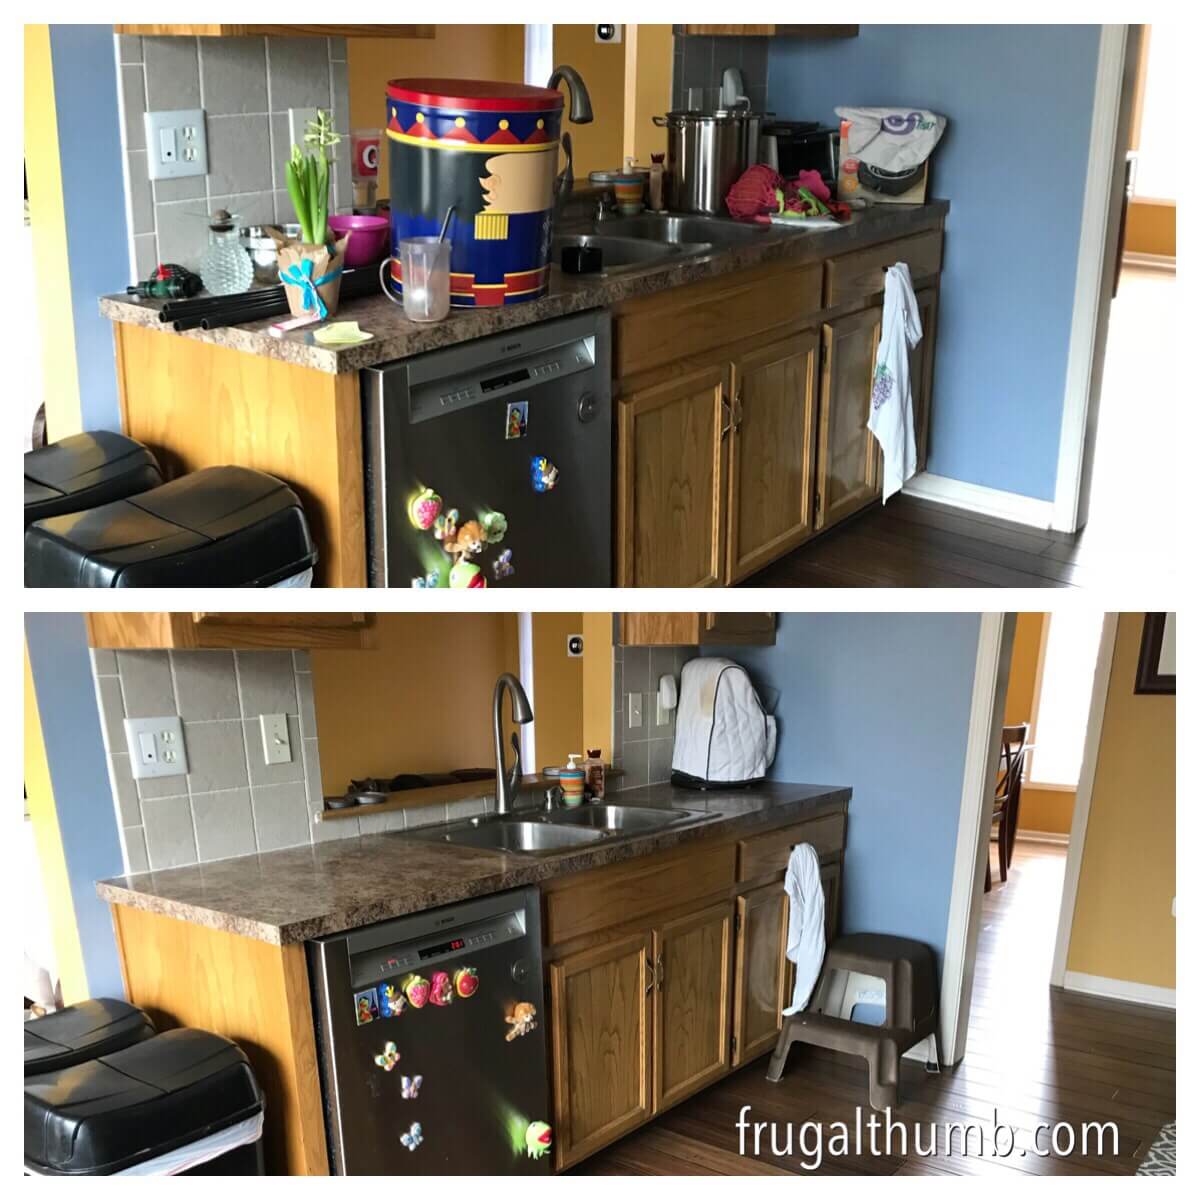
Kitchen – 3 days
This is where guests may go to retrieve food, snacks, silverware, cups, etc so it’s our third high-traffic area to declutter in this guide.
Day 7: Declutter counters.
Any dirty dishes need to go in the sink. Papers need to be dealt with and recycled including items on the fridge. Put food in its appropriate place in the pantry. Make sure any appliances are stowed away, or if used daily, organized on the counters. Finally, wipe down the counters to remove any food particles.

Day 8: Catch up on dishes and wipe down all appliances.
If you have dishes in your sink from the last time block, catch up on those now. Unload/load the dishwasher. Wipe off any food spills that may be visible on your appliances like the fridge, dishwasher, microwave, or oven. After completing this time block, you’ve got 3 rooms decluttered and guest-ready!
Day 9: Recheck spaces from first 8 days and make sure they are still decluttered.
Make sure the areas that you decluttered in the first 8 days are still decluttered. Put things away as needed. If you have extra time left in your 1-hour time block, enjoy the rest!
Guest bathroom – 2 days
What if your guests need to use the restroom while they’re visiting? This is a highly likely scenario, so let’s get that cleaned up for them too.
Day 10: Declutter counters, medicine cabinet, and under sink.
The counter around the sink should be completely clear of items and wiped down. If time permits, clean out the medicine cabinet and under the sink of any expired items. Make sure a fresh hand towel is available.
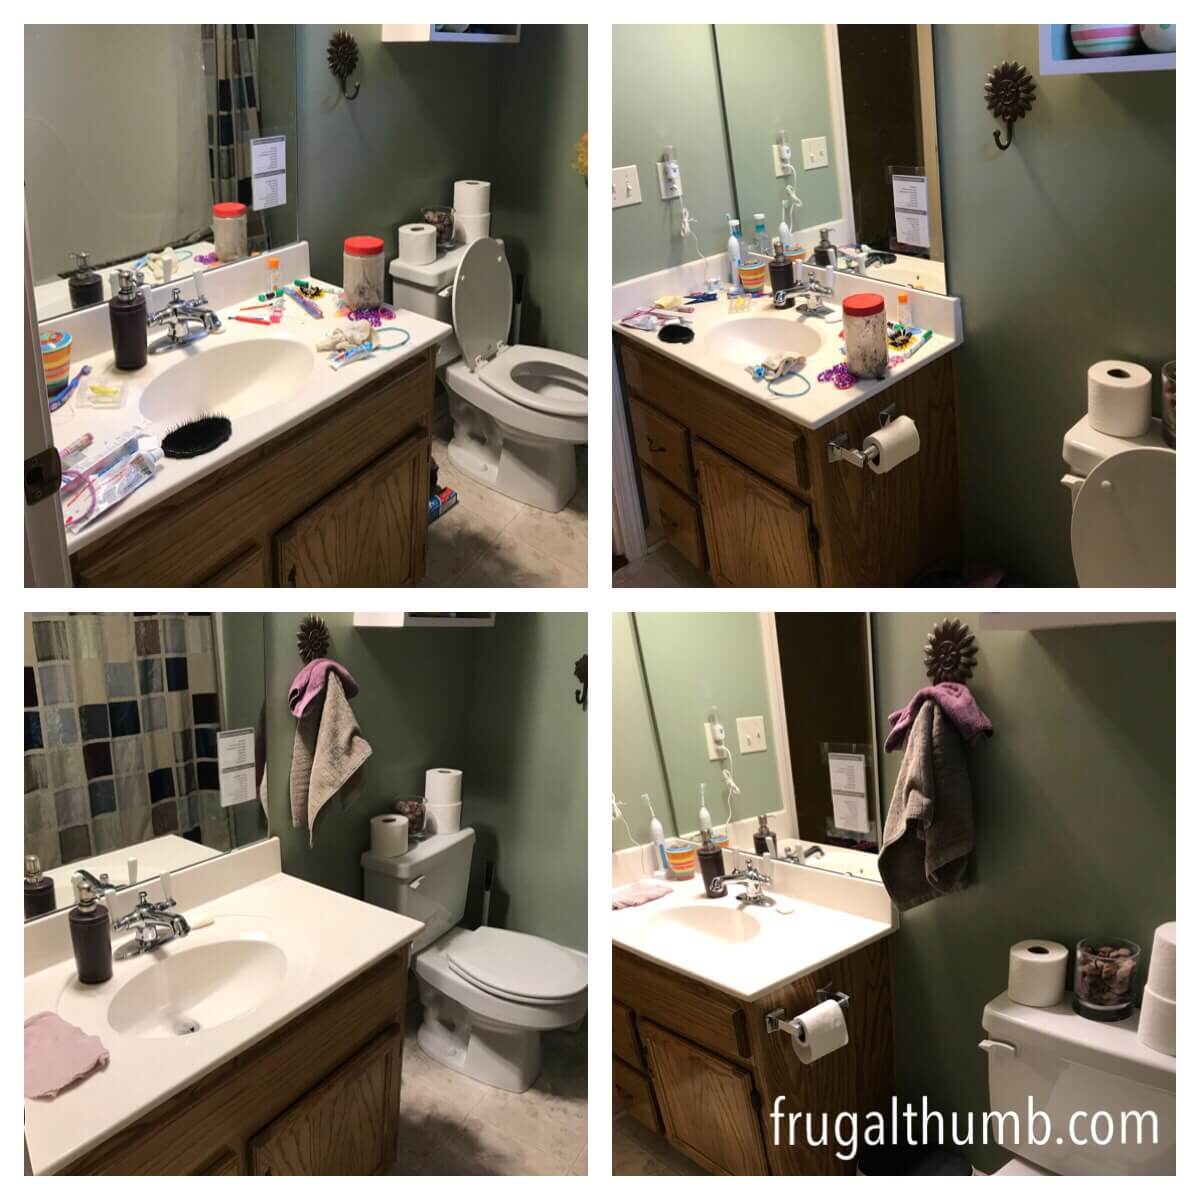
Day 11: Clean the mirror, sink, and toilet.
Guests don’t want to see your spots on the mirror, toothpaste in the sink, or rings in the toilet. Spend this time block cleaning these highly visible, highly used items. Your fourth room is done and there’s only one more to go!
Guest bedroom – 3 days
You are in the home stretch, down to the last 3 days before your guests arrive. The last room we’ll be focusing on decluttering is the guest bedroom for guests that may be staying overnight.
Day 12: Declutter the bed and floor.
I must admit that this room often becomes a catch-all in our home. If you have piles, sort out as much as you can during your time block and put it where it belongs.
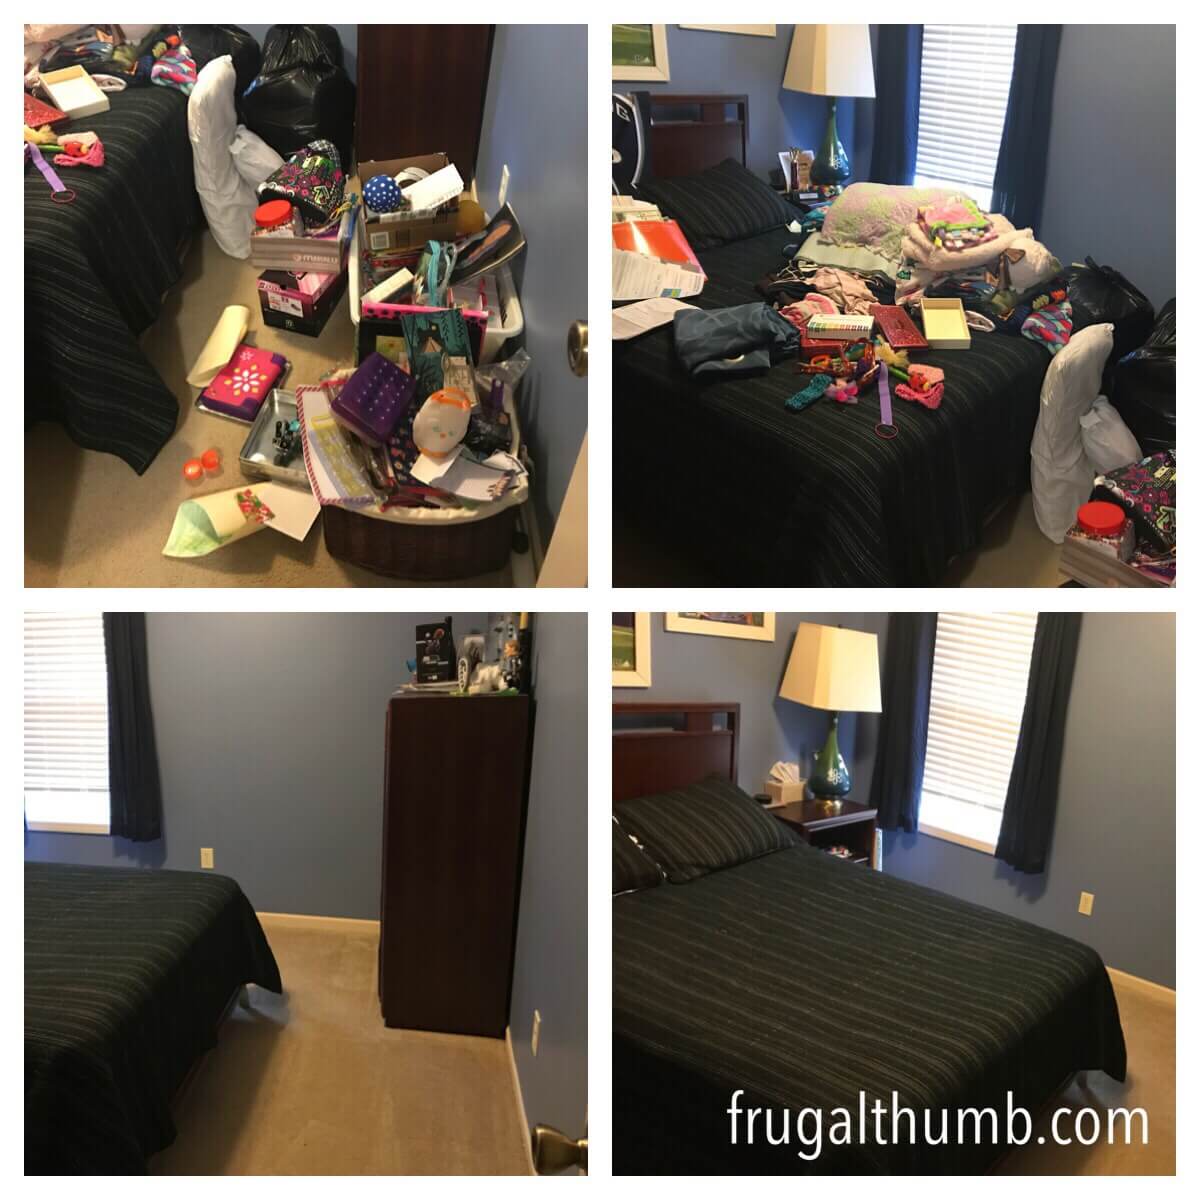
Day 13: Put new sheets on the bed.
Your guests will appreciate fresh clean sheets to sleep on so don’t overlook this task. This won’t take long, so if you’re still behind on yesterday’s task (to declutter the guest room), use today’s extra time to work on that some more.
Day 14: Recheck spaces and make sure they are still decluttered.
This is the 14th and final day of decluttering! Take a walk through your home’s most high-traffic rooms, pick up any items that may have collected over the last couple of weeks in between decluttering sessions, and then bask in the beauty of your guest-ready home.
Welcome your guests proudly!
You did it! Your home has been decluttered and you’re ready for your guests to arrive! Pat yourself on the back and enjoy entertaining your guests during their visit.
2 comments
These pictures (you are so brave!) make me feel like I am not alone! I struggle with being a “messy” and always feeling panicked when expecting guests! Thank you for your honesty and help!
Thank you so much, Venus S! I hadn’t seen these pictures in a long time so it was quite interesting for me to take a look back this week. You are definitely not alone–I’ve been a messy my entire life, but I’m constantly trying to be more organized in my home. And I can honestly say that the effort has been working. When I saw these pictures and compared them to my house right now, I realized that things are a lot closer to the after pictures than the before ones. I know it’s been 5 years and I still struggle, but this was such a nice lift to my day. As one of my favorite messies Sandra Felton would say, “Baby steps baby steps in the right direction!” I hope this helps you make progress too and I hope you have a lovely visit with your guests.