
This post may contain affiliate links, meaning, at no additional cost to you, I will earn a commission if you click through and make a qualifying purchase.
This Christmas card ornament will solve your Christmas card pile troubles in the most wonderful way.
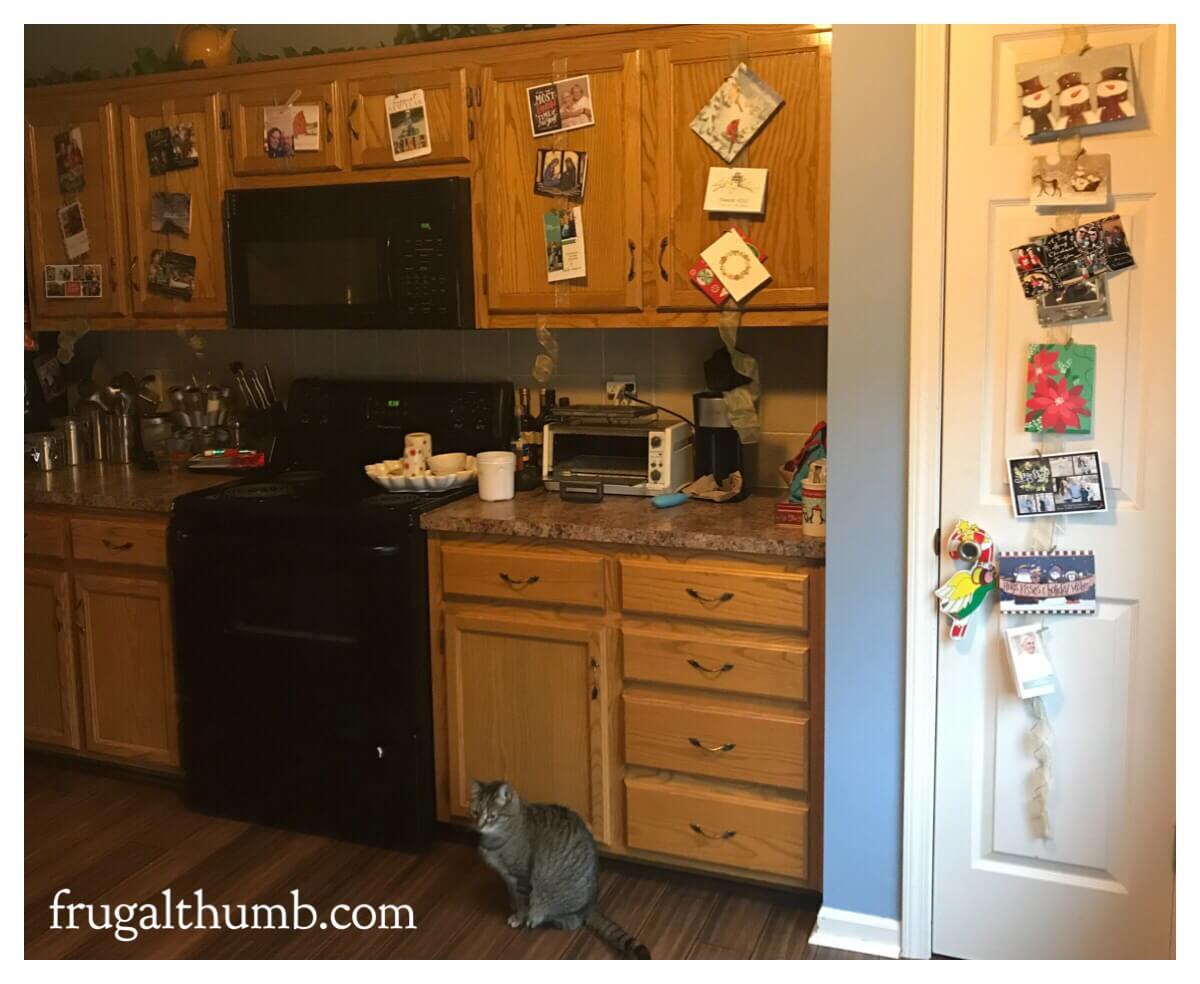
Every year, we get loads of Christmas cards in the mail. It’s truly one of my favorite things to receive these from friends and family! I even put them all on display in our open kitchen so I can see them and add a festive feel throughout the holidays.
But then, when the holidays are over and it’s time to take everything down, I end up with a huge pile of cards that I can’t bear to throw away.
One of my friends shared with me how she handles this problem. And it’s genius, really!
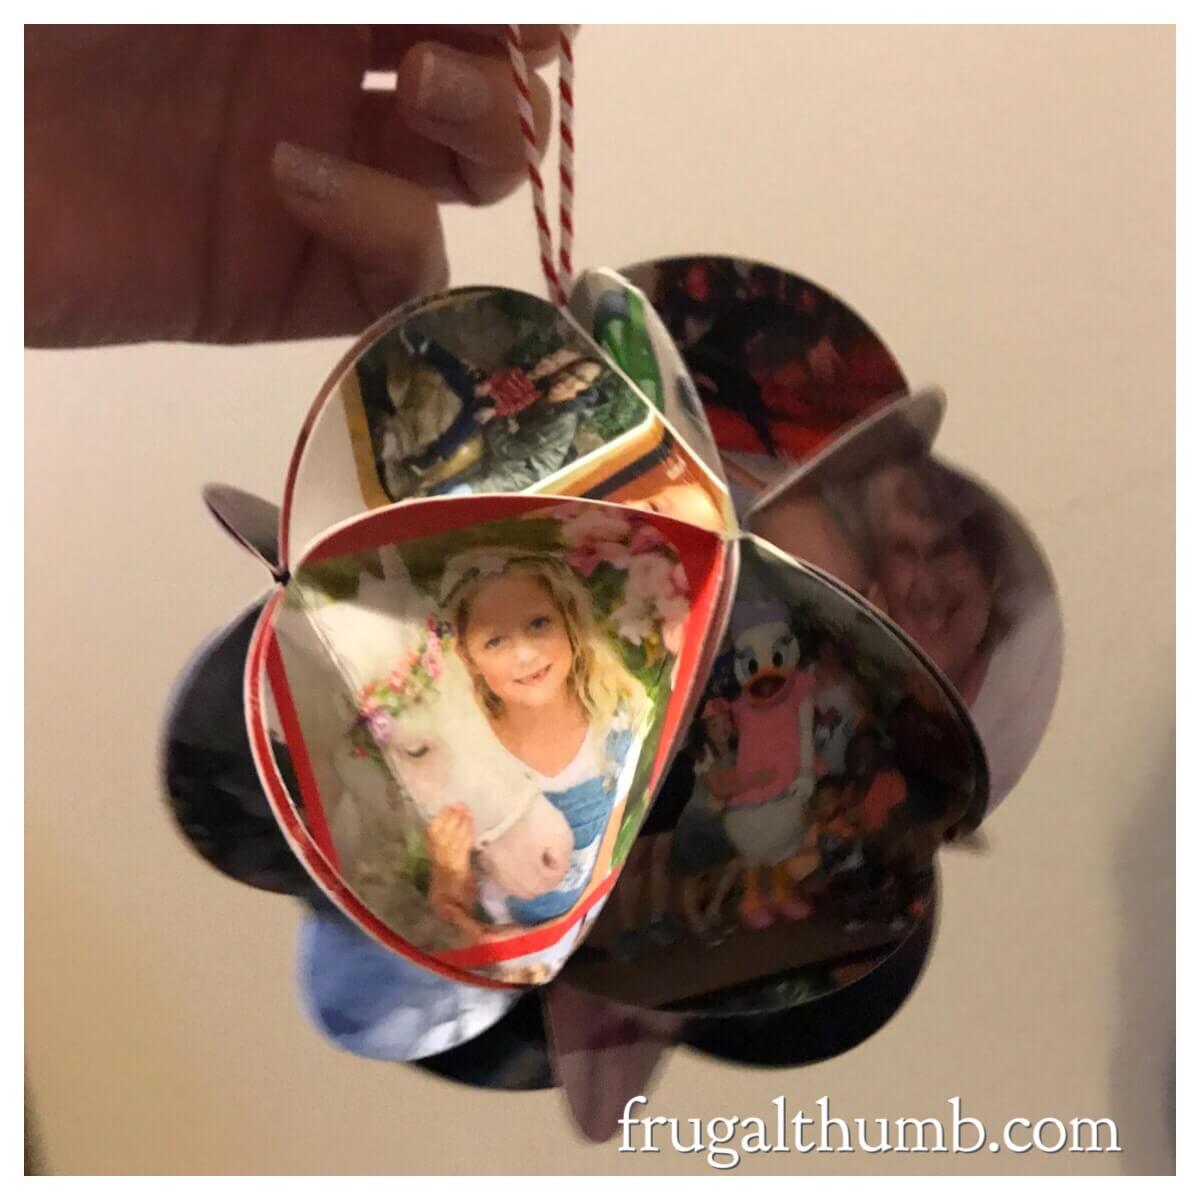
Every year, she makes a beautiful hand-made ornament out of the cards.
These ornaments are an absolutely lovely way to continue to cherish those Christmas cards and photos from loved ones for years to come.
She sent me the below photo of many of the keepsake Christmas card ornaments that she has made over the years, with our family’s cards front and center. I couldn’t even remember what our card had been each year, and she had these ornaments to remember each one by. It was soo cool, and so touching.
When I told her how much I loved these and wanted to start making my own, she surprised me by gifting me with the tools and instructions that I needed. Yeah, she’s a good friend!
And so, I will be paying it forward and sharing this wonderful DIY project to help you save your Christmas cards as a keepsake ornament too.
I’ve included a video to show you how to make the ornament, along with step by step instructions that you can easily follow in this blog post.
Supplies Needed for Christmas Card Ornament
- Christmas cards – collect all of your special cards in a pile for now
- Circle Lever Punch – I recommend the 2.5 inch size. It’s not so small that it’s hard to get faces in the pictures, yet not so big that your ornament ends up HUGE. Here’s a link to one like what I use. It has a window in the bottom so you can easily see where you’re cutting.
- Elmer’s Glue
- Scissors
- String – for hanging the finished ornament
- Clear tape (optional for easier assembly)
- Clothespins (optional for easier assembly)
Instructions for Christmas Card Ornament
There are 3 main steps for making your own Christmas card ornament. It really comes down to making your triangle template, cutting out your 20 circles and folding them into triangles with your template, and then assembling the circles.
Let’s get started!
Step 1: Make your triangle template.
First, we need to make a triangle template to use for folding all of the circles that we’ll be using to make the ornament.
Cut out an extra circle with your circle lever punch–not from a card that you’ll be using for the ornament!
You’ll be folding this circle into an equilateral triangle.
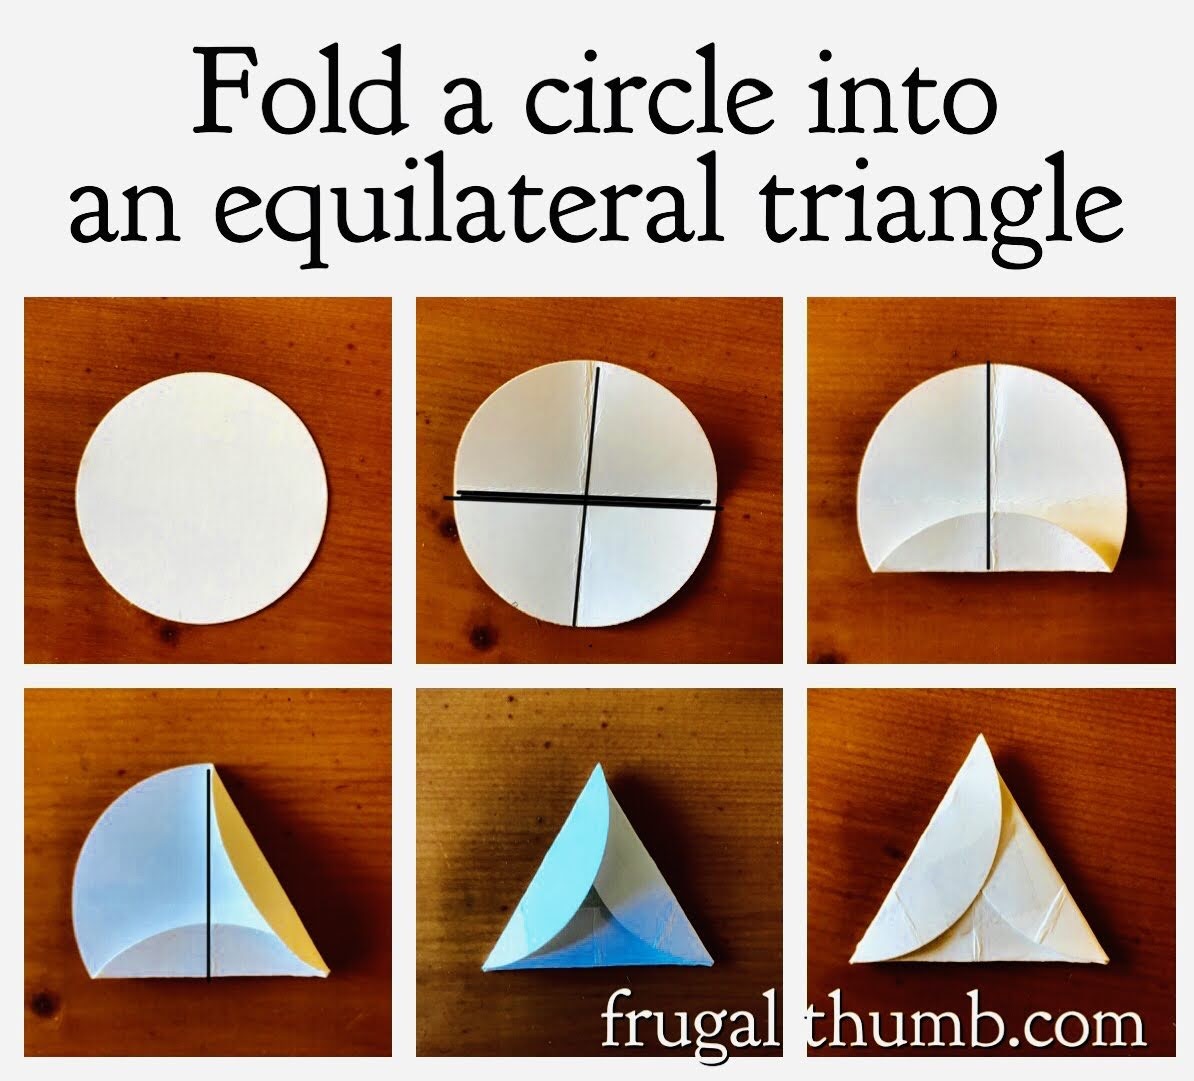
Fold the circle in half both ways. Unfold.
Then fold one side up to the middle fold. This creates the first side of your triangle.
Now fold the second side up from the edge of the first side, making sure it aligns with the middle fold.
Finally, fold in the last side along the other two edges made by both the first and second sides.
Tape your equilateral triangle template closed.
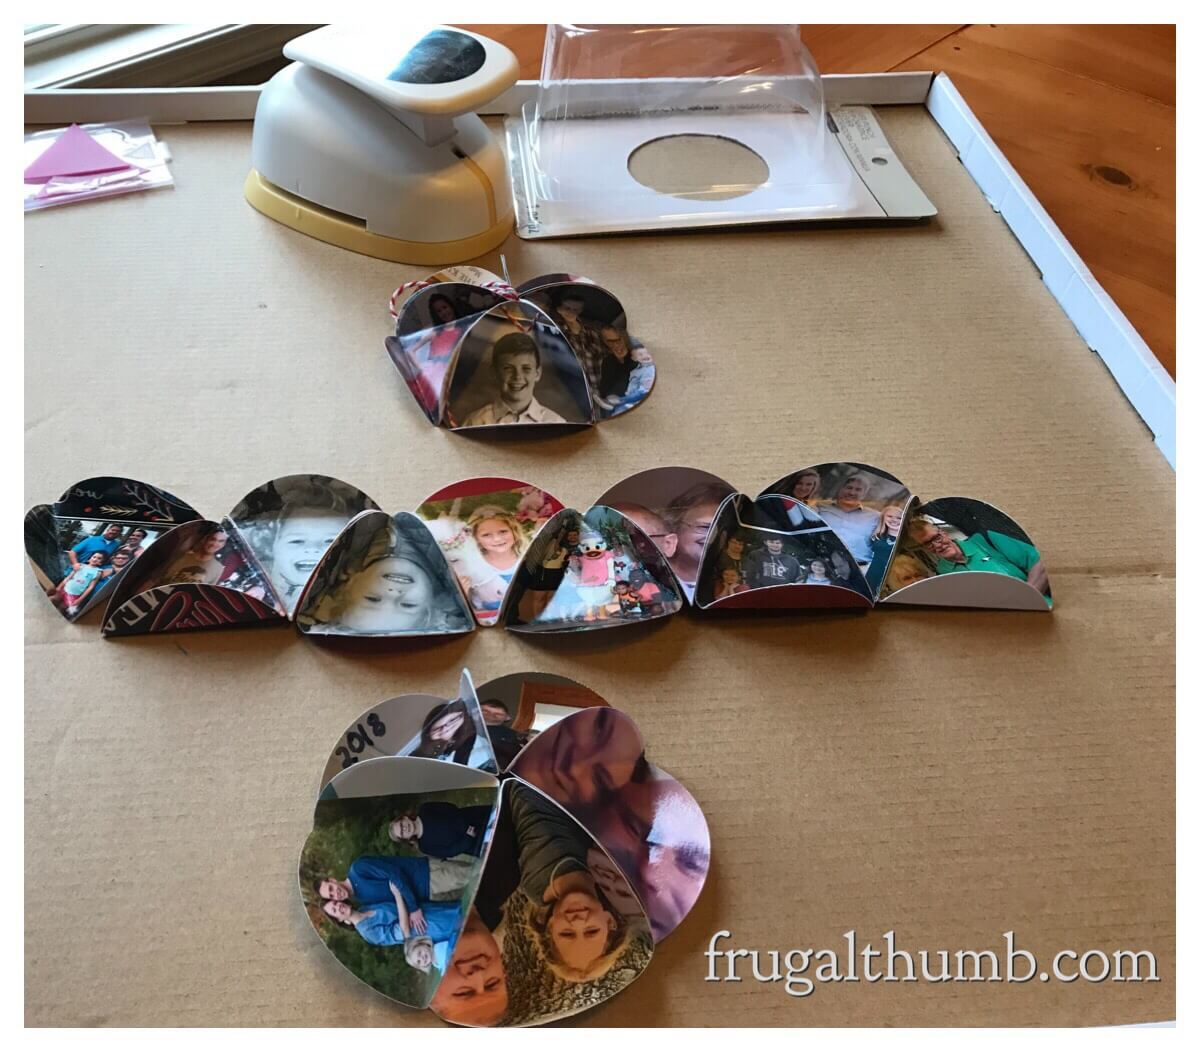
Step 2: Cut out 20 circles from all of your Christmas cards and fold them using your triangle template.
A single ornament requires exactly 20 circles, all the same size.
Use the view through the bottom of your lever punch to see where you’re going to cut the card and move it around until you like what is in the circle.

If you need to, cut some of the card off the edges so you can center what you want to see in the circle. And practice on regular paper a few times first until you get the hang of it. Then start cutting your actual Christmas cards.
Frugal Thumb Tip: Choose one circle and write the year on it. Then you’ll know when you received these cards when you get the finished ornament out again in future years.
I always write the year on my family’s Christmas card circle.

Using the template triangle you created in step 1, fold in the edges of all the circles so they all have a triangle shape in the middle.
Your template triangle should fit nicely into the middle of your other circles. Use it to decide where to fold your 20 circles.
Frugal Thumb Tip: Try not to fold through the middle of faces. I move the triangle around until I get a good angle where most faces are fully outside the folds.
Here’s how my folded circles look:

Frugal Thumb Tip: If you’re feeling really ambitious, you can cut an equilateral triangle of the appropriate size out of an old semi-transparent cutting board. This makes it super simple to see where you’re going to be folding the photos on the circles and also provides a sturdy edge to make it easier to fold it. My friend gifted that to me too and it was GREAT!

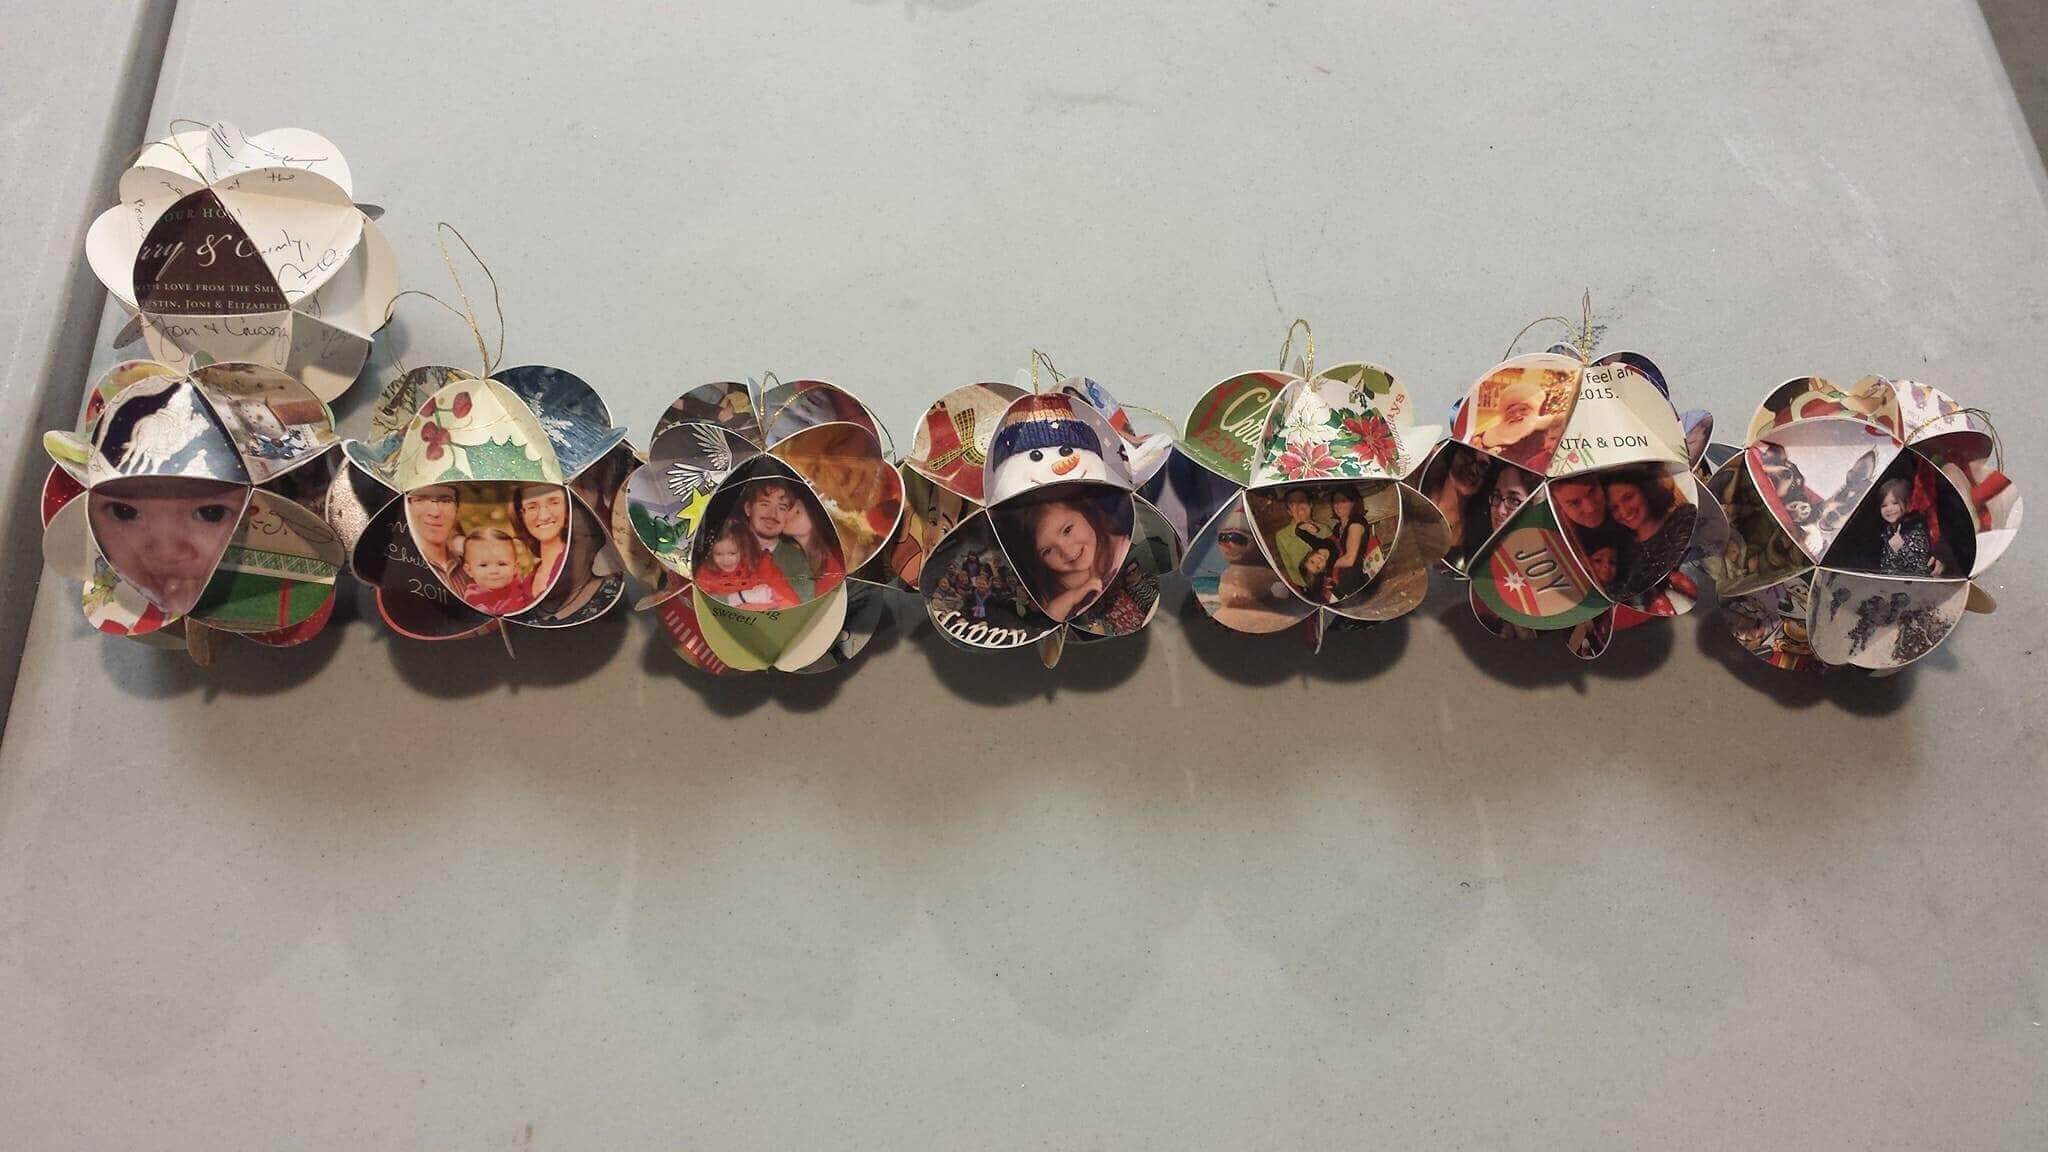
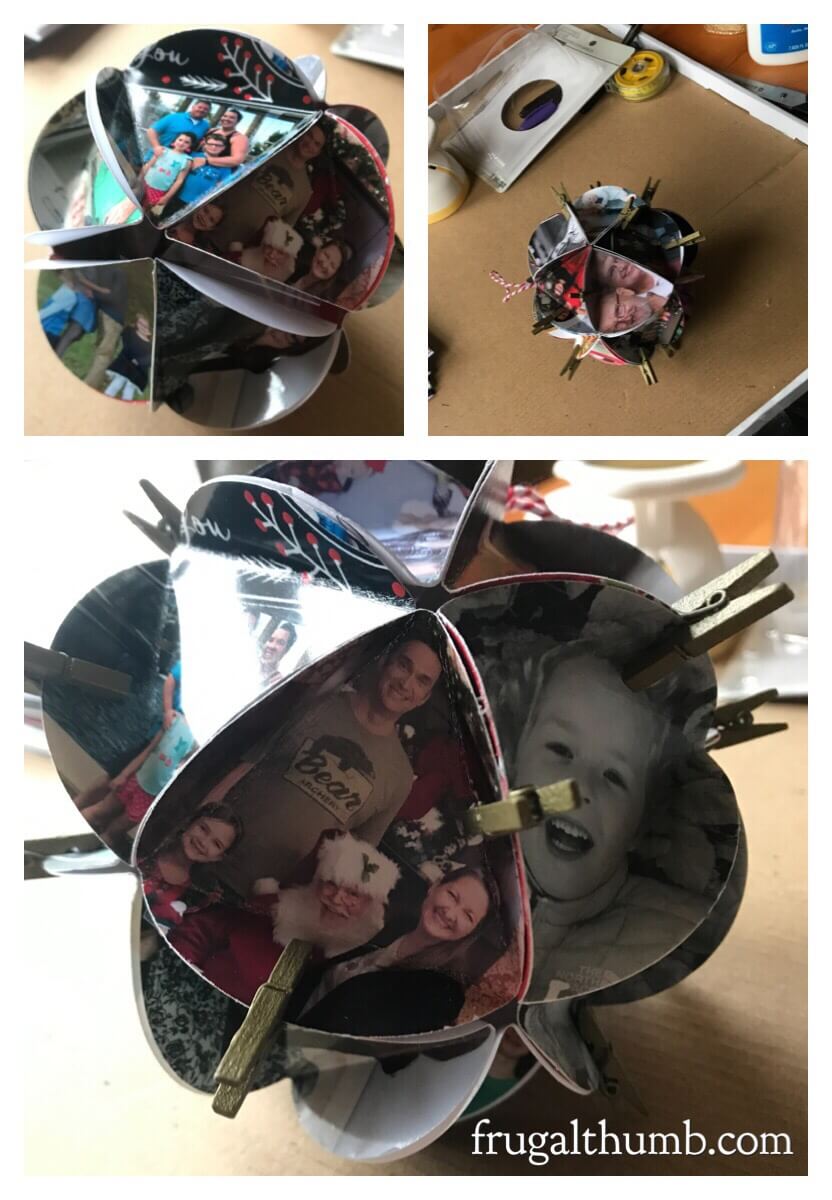
Step 3: Pick out 5 circles for the top of your ornament and assemble.
Now it’s time to start assembling all the circles into the ornament!
This is where your glue, and optional tape and clothespins come into play.
Pick one of the 5 circles and tape your string for hanging the ornament to the back of it so it is visible coming out of the top point of the circle’s triangle fold.
Then tape and glue one folded edge of each circle to one folded edge of the next circle. Continue until all 5 are together. If you’ve got tape, use it on the inside of the ornament along the edges to hold the circles together while the glue dries. See in photo collage below.

Step 4: Pick out 5 circles for the bottom of your ornament and assemble.
Repeat the previous step to make the bottom of your Christmas card ornament, sans string.
Once you have assembled the top and the bottom, you’ll have two little 3D pieces for your ornament.
Step 5: Assemble the final 10 circles into one long strip.
Now it’s time to use the last 10 circles for the middle to bring it all together.
Lay out the rest of your circles and decide which way you want each triangle to face. Once you’ve got them how you want them, use your glue and tape to stick the edges together and form a long strip.
Step 6: Attach the long strip to the top and bottom pieces.
Glue/tape circle top edge from the long strip to one circle edge from the top 3D piece at a time. Continue until the strip circles go all the way around the top piece.
Then repeat with the bottom piece. The last couple of circles will have to forgo the tape (if you’ve been using it) and be put together solely with glue.
Frugal Thumb Tip: If you’re struggling to keep the pieces together while the glue dries, use clothespins. They eliminate any glue frustration and speed up the process exponentially.
Step 7: Wait for the ornament to dry.
At this point, you may find that you’re already admiring your handy work and feeling excited about your nearly complete Christmas card ornament.
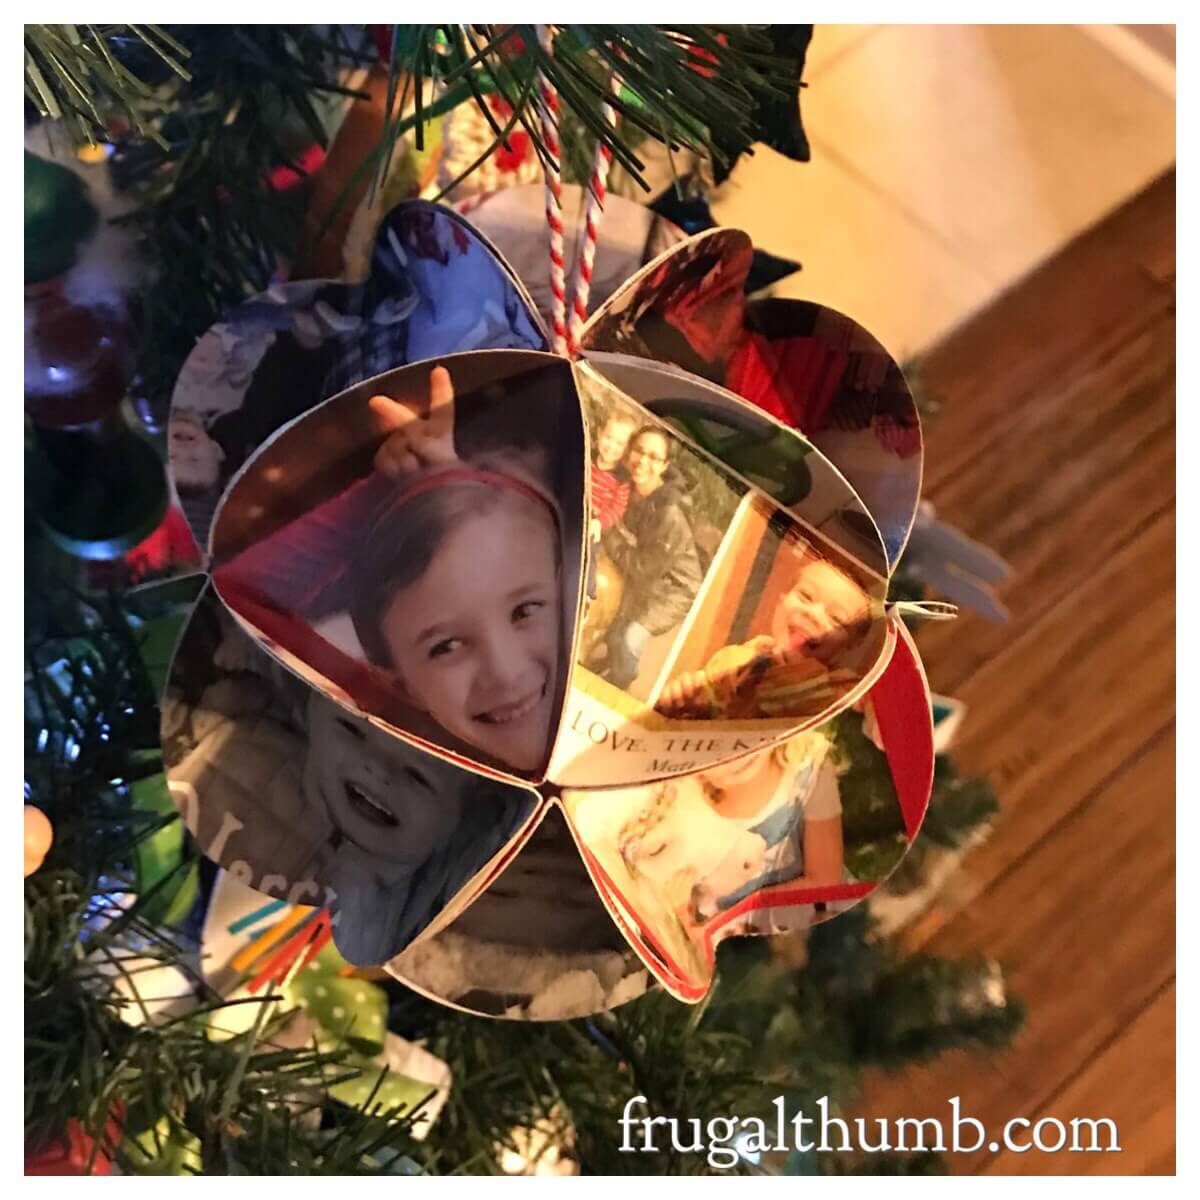
Once it has dried, your keepsake Christmas card ornament is ready for prime time. You can hang it and display it to remember all the great photos you received from friends and family that year.
You’re done!
I just love how this Christmas card ornament looks and know I’ll be spending a lot of time enjoying it and reminiscing when I see it next year. I’ll definitely be making this project a yearly tradition!
Update: I now have 4 yearly Christmas card ornaments dating back to 2017! I love them so much that they hang from our fireplace year-round. 🙂
If your Christmas cards just end up in a pile or, heaven forbid, the trash after the holidays, you should consider making this lovely keepsake Christmas card ornament instead!
Most likely, your only investment will need to be the circle lever punch, an investment of about $15. And you can use it year after year.
You’d spend more than that on one ornament from Shutterfly!
What do you think of this DIY project idea? Does it solve the Christmas card problem for you?
Please share in the comments.
4 comments
Great to have a refresher! I hang mine year round from a silver tree on top of my bookcase!
That sounds lovely. ☺️