
This post may contain affiliate links, meaning, at no additional cost to you, I will earn a commission if you click through and make a qualifying purchase.
Growing veggies from seeds rather than buying grown plants will save you lots of money on your garden. Not to mention the savings on the grocery bill when you’re enjoying your fresh picked veggies for dinner!
It’s also fun and a great learning experience for kids and adults alike.
With all of the food recalls in the past year, growing my own veggies is a much more attractive alternative.
I want to know if/what chemicals have been used on the foods I’m eating.
And if I grow my own veggies, I know exactly what’s been put on them. From seed to table.
Plus, by starting seeds indoors early, there’s the benefit of getting into gardening again when winter seems to drag on and on… I enjoy making my own little spring indoors when I start getting stir-crazy and impatient for spring outdoors.
Since I want fresh, homegrown veggies this summer, I’m starting seeds indoors now!
It’s March, so that should give me a good start on the growing season.
It just takes a bit more patience and care, but it’s well worth it.
There are many seeds that can be started before the last frost as long as they’re kept protected indoors. And more growing time means a better harvest!
Around here in Hardiness Zone 6a, I’m hoping to get my successful indoor seedlings into the ground outside by mid-April.
You can start seeds indoors for your veggie garden this year too! It’s simpler than you think.
If this is your first time starting your veggies from seeds, you don’t need to spend a fortune to be successful. In fact, it can be a rather frugal undertaking.
For starters, save your money on seed starter kits.
Instead of spending money on seed starter kits at the store, you can easily make your own!
And you can make them with items you probably already have in your home right now!
Read on to get started on your successful veggie garden for less this year.

I’ll walk you through each step of making your seed starter kits so you’re sure to have a successful growing experience.
First, there are few things you need to gather together for these DIY seed starter kits.
Step 1: Gather supplies needed
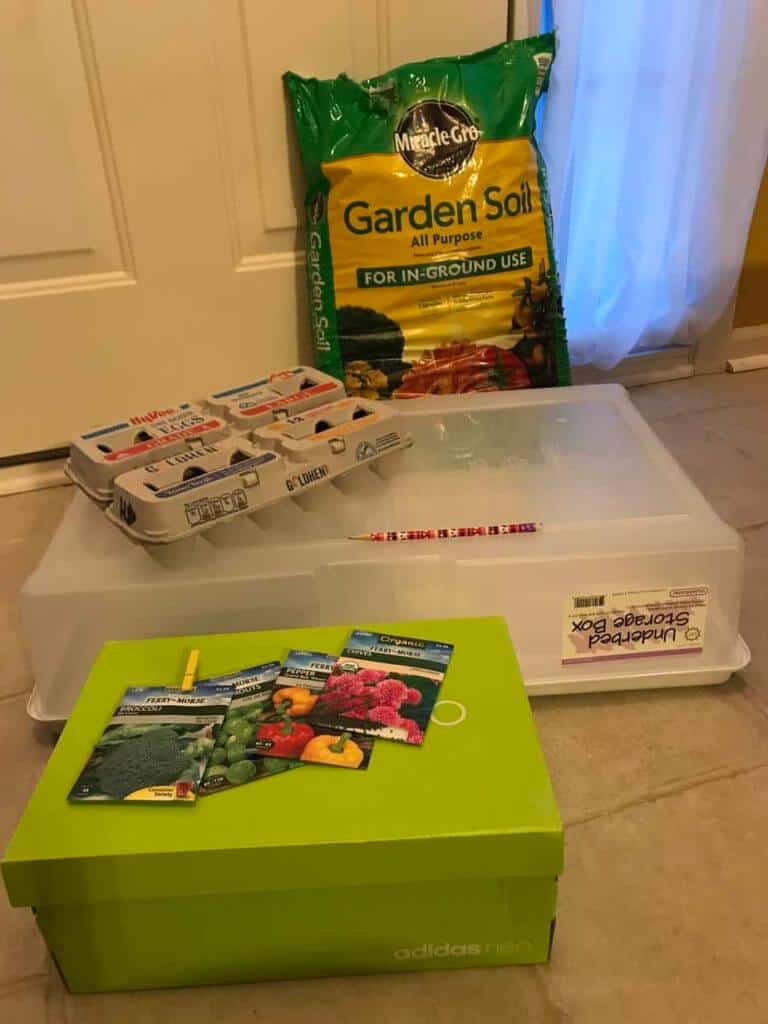
Supplies:
- Cardboard egg cartons: Save up a stack of these cartons whenever you use up your eggs at home and you’ll have free and easy-to-use seed starters. Note: If your eggs don’t come in cardboard cartons, paper towel or toilet paper rolls are the next best thing to keep for free seed starters.
- Egg shells: When you’re cracking your eggs for cooking, try to crack it it near the middle. Then rinse and save the halves. These will line your egg carton seed starter kits.
- Used coffee grounds: If you or someone you know is a coffee drinker, save those old coffee grounds! It’s free nutrients that you can add to the soil.
- Dirt: If you don’t have the money to buy a bag of soil at the store, you can take some from old unused flower pots. If you’re like me, you may have a few in the garage or backyard. In a pinch, you can even dig up a bit from the yard. Just make sure you don’t dig up any cables. Call before you dig if you need to have the location of any underground stuff marked for you.
- Clear plastic storage containers (optional): These are great for covering and protecting your seedlings as they start to grow while still letting the sunshine in. Check your garage for clear plastic tubs that can be put to this use.
- Spray bottle: You can find these at the dollar store or rinse/save an old bottle from your cleaning supplies.
- Scissors: You’ll need some scissors for cutting the cardboard.
- Pencil: For poking holes in the egg cartons. Really, anything thin and a bit sharp will do.
- Old plastic spoons or straws: These will be used to label your seed starter kits.
- Permanent marker: for writing on the plastic spoons/straws.
- Seeds: The only thing in this supplies list that I had to buy for my seed starters were the seeds! You can save money on seeds by sharing packets with gardener friends. At the end of this growing season, you can save seeds from your own harvest for next year.
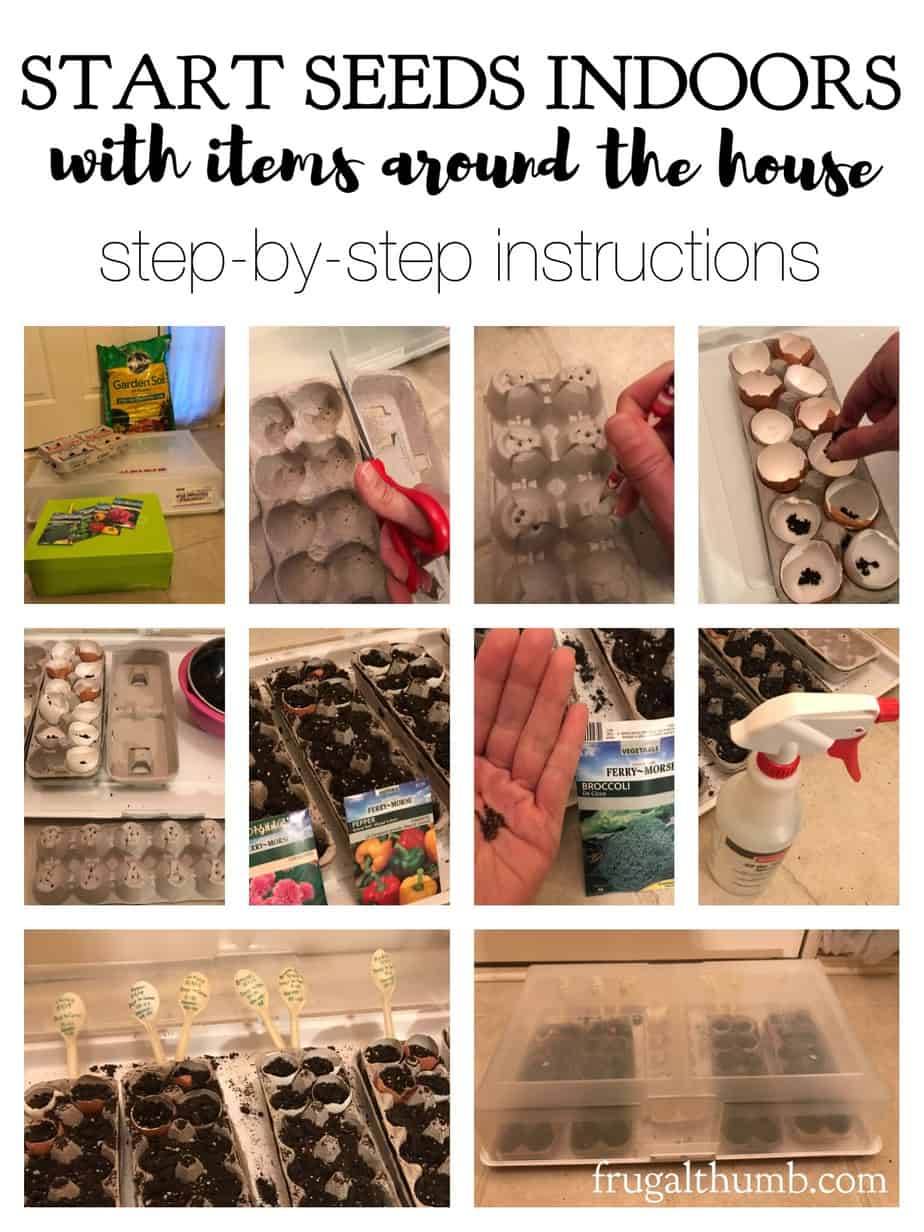
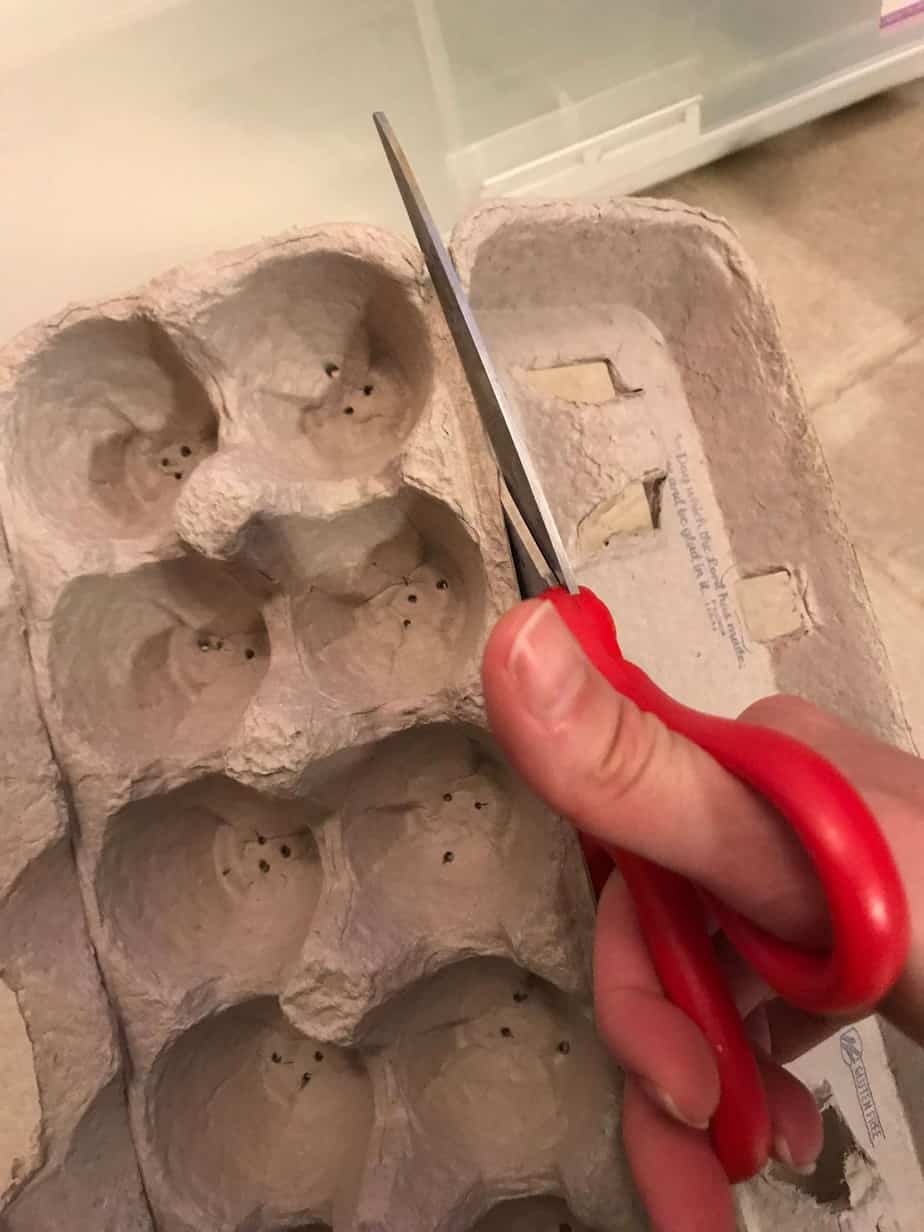
Step 2: Cut egg cartons.
Remove the lids from the egg cartons with a pair of scissors. Set the lids aside for now. They will be used as a tray to set the bottom half of each egg carton inside.
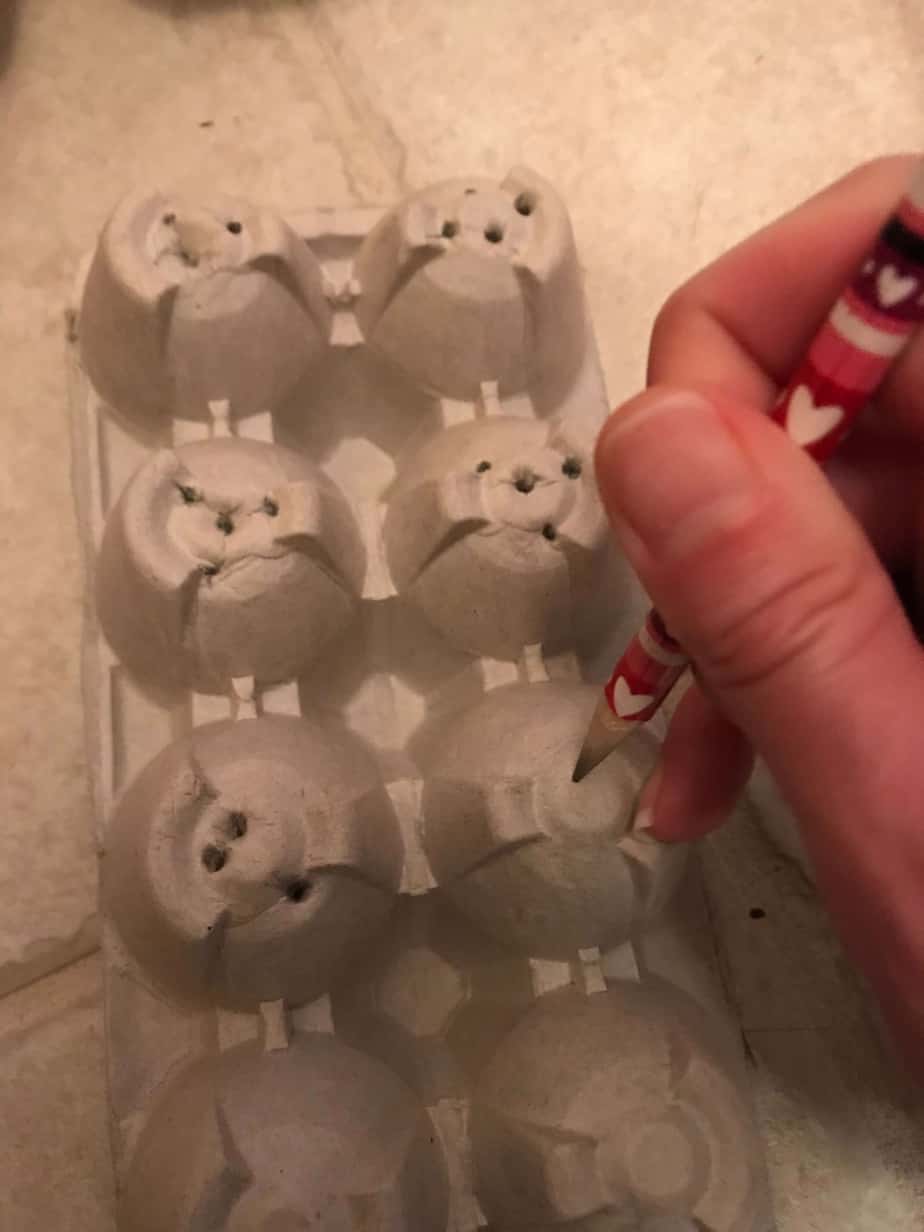
Step 3: Poke 3-4 holes in the bottom of the egg cups to allow drainage.
Use the pencil to poke a few holes in each egg carton cup along the egg carton. This will allow water to escape and prevent your seedlings from drowning or molding.
Step 4: Place each egg carton bottom in its lid.
Once your egg carton cups have drainage holes, you can put the egg carton bottoms back into the egg carton lids. This will help avoid any messiness from leaks and provide more stability if you everhave to lift/move the cartons.
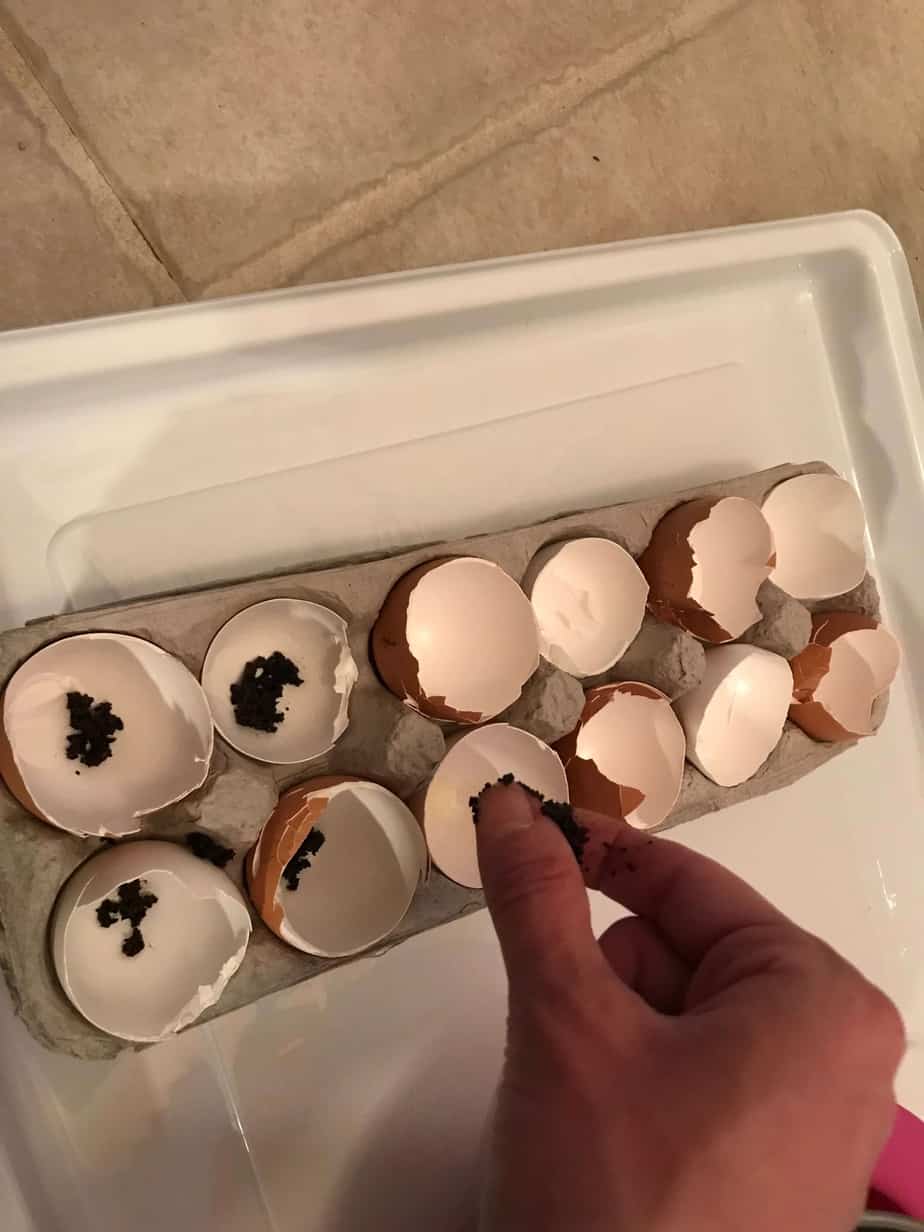
Step 5: Add egg shells and coffee grounds.
Put a clean half egg shell in each egg carton cup. Then sprinkle a few pinches of coffee grounds in the bottom.
Don’t skip the egg shells. I hadn’t saved up enough for every egg carton cup so I planted some with the egg shell liner and some without. The seeds with the egg shells had nearly a 100% germination success rate. I share my two-week stats for the seed starter kits at the end of this post.
Egg shells have many uses when it comes to gardening.
For these seed starter kits, they are handy as little egg carton cup liners. That’ll make it even easier to transplant the seedlings when it’s time to move them outside.
And the shells can also be crumbled up and added to the soil for free nutrients. Then once you transplant the seedlings outside, you can use the egg shells sprinkled on top of the soil around the stems to deter slugs from eating the plants!
Step 6: Fill egg cartons with dirt.
Make sure the egg carton cups are completely full and do not compact the soil.
I had an extra bag of dirt leftover from last year so that’s what I used for my supply.
Step 7: Plant seeds.
Following the directions on the seed packets, plant one seed per egg carton cup at the appropriate depth.
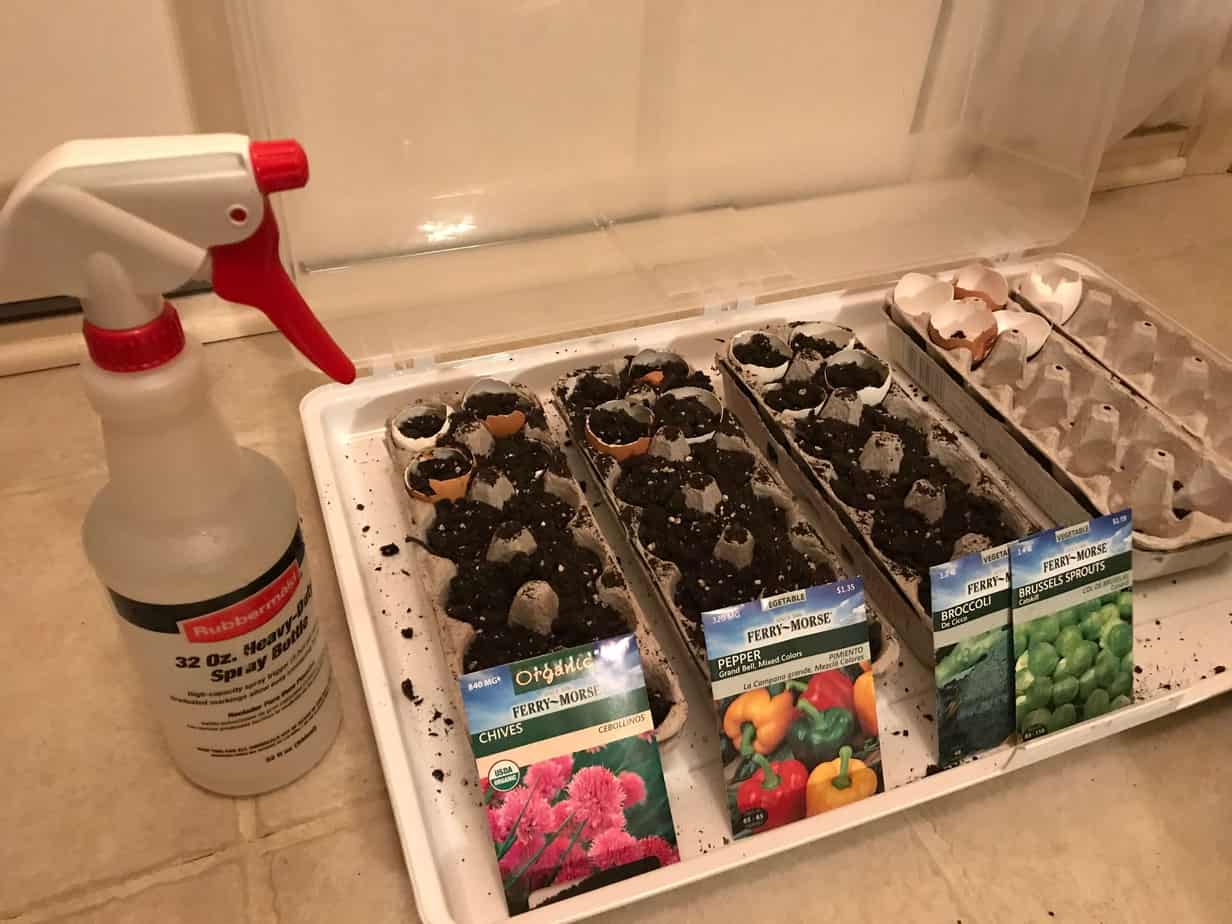
Step 8: Mist each egg carton with water.
You want to be able to water the seeds and little seedlings without drowning them or washing them away. Misting with a spray bottle works perfectly for this.
Step 9: Label the seeds.
For each type of seed you plant, write the details on an old plastic spoon or straw.
- Plant name
- Date planted
- Days to germinate
- Days to harvest
Then slide the labels in between the egg carton lid and carton cups.
Don’t skip this step!
Believe me, it’s so worth it. Take a few minutes to make these. You may think you’ll remember exactly what you planted, when you planted it, and where, but save yourself the brain strain.
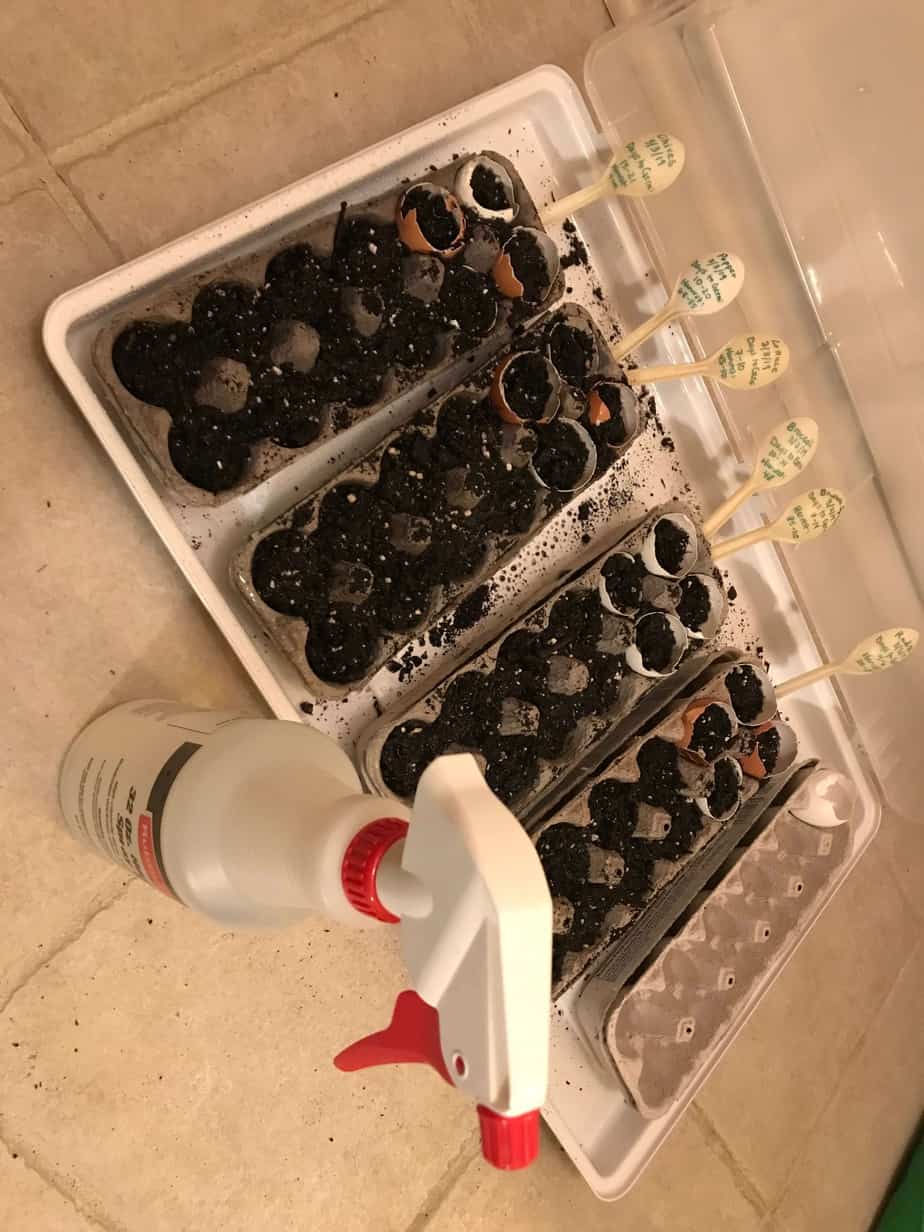
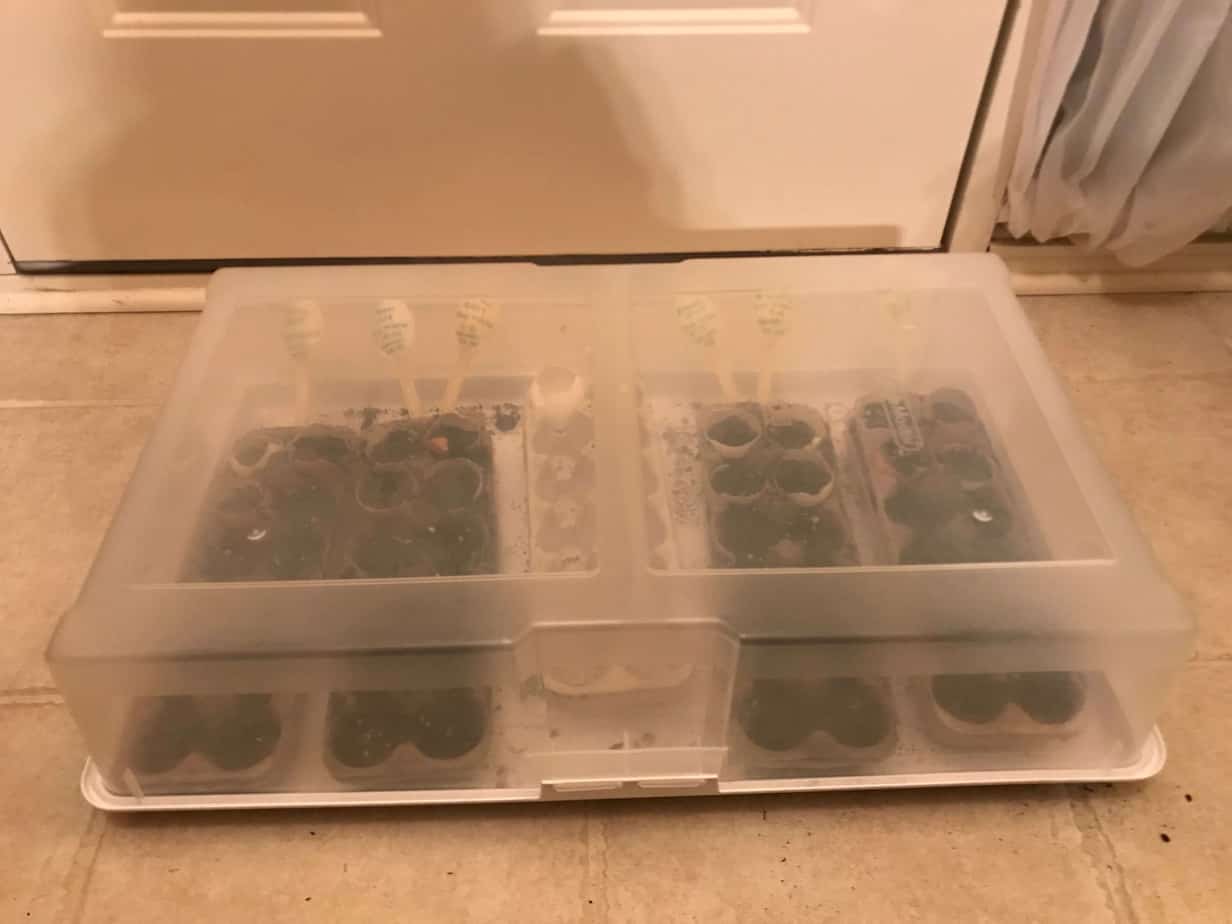
Step 10: Close plastic tub and move to sunny location.
A plastic tub will prevent pets and children from digging into or knocking over your seed starters. The clear plastic still allows the sun to shine on the seedlings and produces a greenhouse effect, keeping your seedlings warm despite the winter weather. And another bonus, you can put the egg cartons on the tub’s lid to both protect your floors and easily transport your little greenhouse as needed.
If you don’t have any fears that someone or something may get into your seed starter kits, then this is an optional step.
However, if you have pets or children, I highly recommend using a clear plastic storage tub to protect your hard work.
At my house, this is a necessity because my cats think the window is for them alone to enjoy. And any green plant must be for chewing.
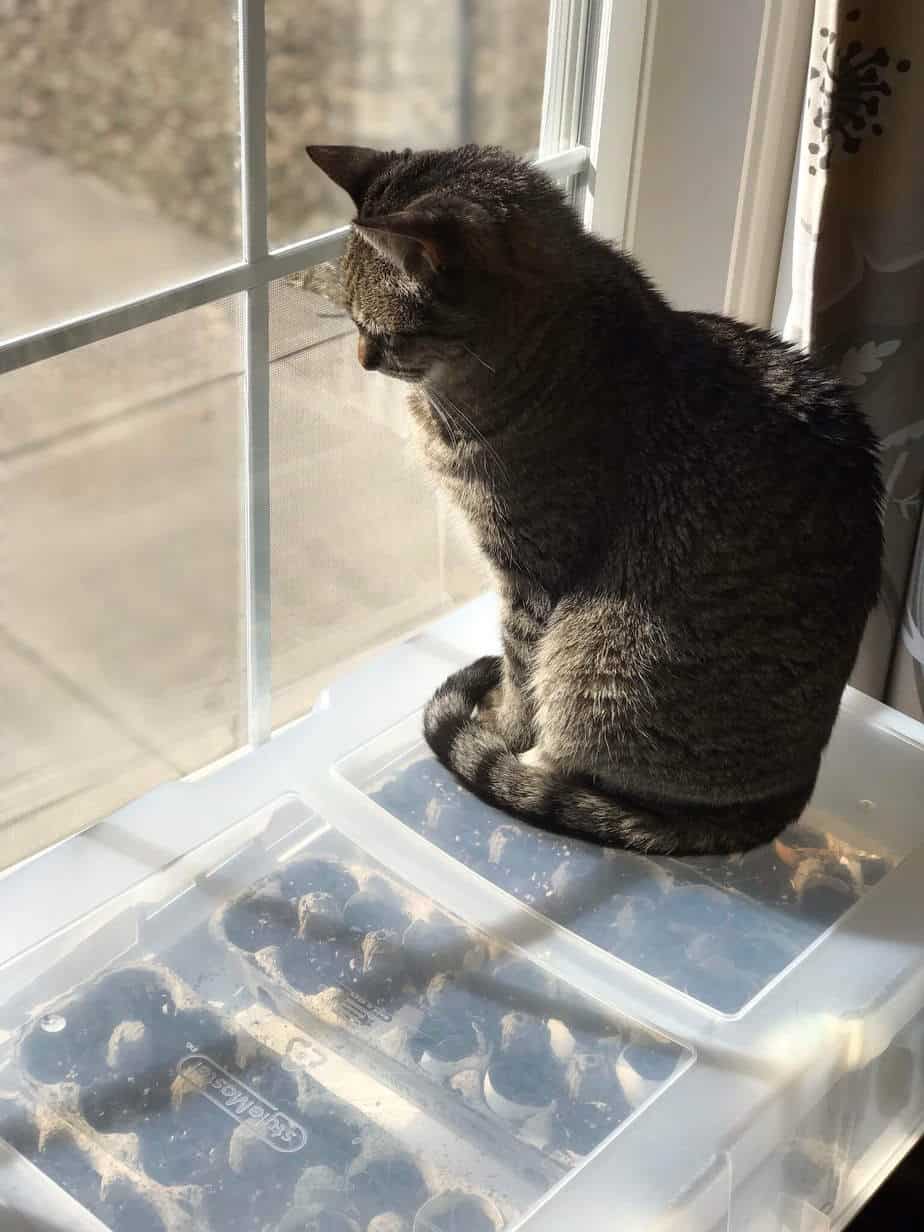
Note: I opened the lid from time to time when I was around and could prevent any cat mishaps.
Important: Check seeds daily.
You will need to check the seeds daily and mist them as needed to ensure the soil stays moist.
Seed starter kits, one week later…
Radishes, Broccoli, and Brussels Sprouts- Oh my!
These three types of veggies sprouted right away. So far, so good.
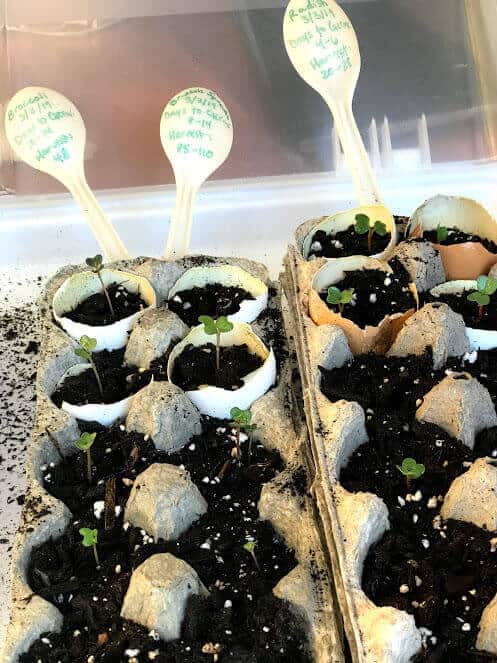
I planted chives, bell pepper, lettuce, and green onion too, but they took a little longer to sprout.
Seed starter kits, two weeks later…
After 16 days, every type of veggie that I planted has at least a few seedlings. And they grow a little more each day, keeping it new and exciting.
A fun and successful DIY seed starter kit experience!
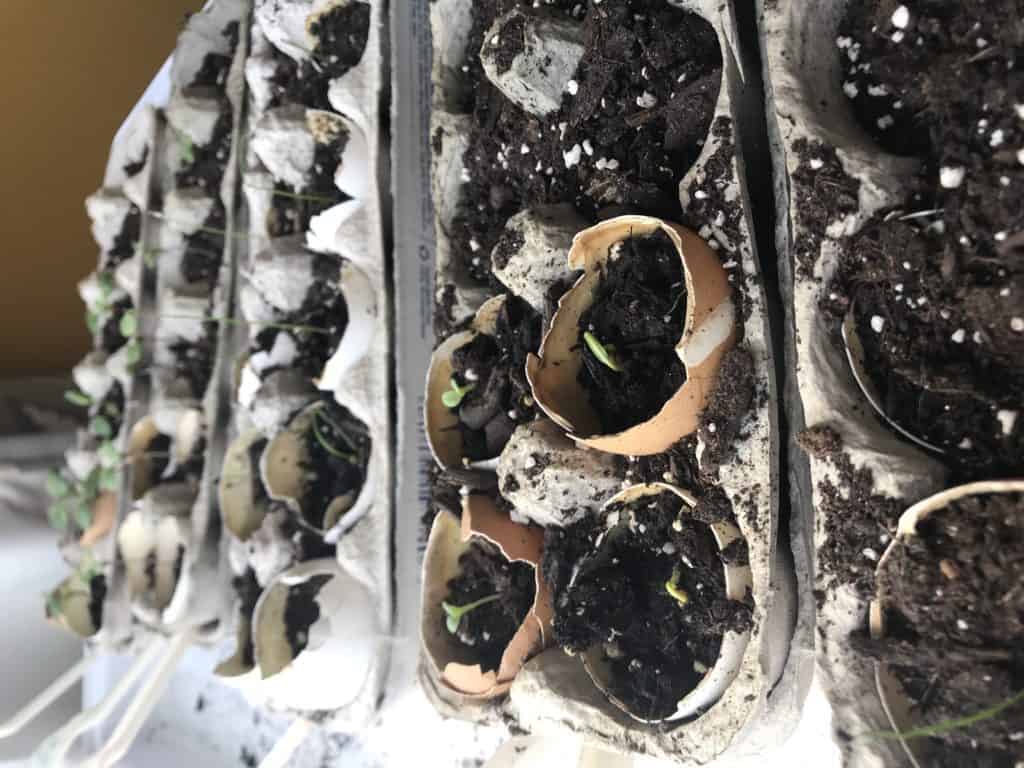
However, I noticed something very interesting about the success rate.
When I counted out how many seedlings had germinated from the egg shells in the egg cartons versus the plain egg cartons, the numbers were too different to be a coincidence.
The only difference between these seed starters was the egg shell liner. Both kinds of seed starters had coffee grounds sprinkled at the bottom. Both were misted daily and placed in a sunny window. They were all planted at the same time, etc.
Yet somehow, here are my germination stats:
- Radishes: 4/4 with egg shells, 3/8 without
- Brussels sprouts: 2/2 with, 2/4 without
- Lettuce: 2/2 with, 1/4 without
- Bell pepper: 2/2 with, 1/4 without
- Broccoli: 2/2 with, 4/4 without
- Green onion: 9/9 with, 0/3 without
- Chives: 3/4 with, 1/8 without
Out of 25 seeds planted in egg cartons lined with egg shells, a whopping 24 have germinated! That’s a 96% success rate.
And out of 35 seeds planted in the plain egg cartons, only 12 of 35 have currently germinated. That’s only 34%.
A couple of weeks ago, I would’ve said that the egg shells were an optional step, but now that I’ve totaled up my seed germination percentages…
Don’t skip the egg shells!
Now, its just a matter of caring for these seedlings a few more weeks until it warms up enough to transplant them outside.
I hope that I’ve proven to you that starting seeds indoors is affordable, easy, and fun.
Good luck and enjoy your veggie garden started from seeds indoors!
If you enjoyed this post and found it of some use, please share! Frugal Thumb is on Facebook, Pinterest, and Twitter.
38 comments
I don’t have the cardboard cartons, they are foam. Would that work? How would you use toilet paper or paper towel cardboard?
Hi Sherri, please don’t use the styrofoam cartons! They will not biodegrade so you can’t plant your seedlings without really disturbing them. Here’s a really good tutorial on using the toilet paper rolls if you don’t have cardboard egg cartons: https://www.thespruce.com/toilet-paper-rolls-for-seed-starting-2539798
What is the name of the plastic tote? Where can I buy it?
Hi Claudia, really any clear plastic tote will do, but if you need to buy one, I’d look for ones similar to this one that I saw at Lowe’s: https://www.lowes.com/pd/Hefty-8-5-Gallon-34-Quart-Clear-Base-with-White-Lid-Tote-with-Latching-Lid/1000505535
It’s about $10 and, based on the dimensions, looks like it would hold 4 egg cartons for seedlings.
Hi!! How do you know when it’s time to transplant them outside? Is there a certain size or time? Do you have any posts about transplanting?
Hi Jackie, you want to make sure you’re past the day of the last spring frost in your area before planting your seedlings outside. It also depends on what you’re growing. I think a good rule of thumb is to wait until your seedlings have at least 4 true leaves.
This article explains the process of hardening off your seedlings before you transplant them: https://www.almanac.com/tips-transplanting-seedlings
Thank you SO much for this post. Great information. With the social distancing I’m missing out on going to the nurseries to buy seedlings. I figured this is a good year to learn how to start my own from seed. When I looked at grow kits for sale online I was shocked at the prices. So glad I found you.
Thank you, Claudia!
I hope you can find what you need around the house. It really doesn’t have to cost much to grow seeds.
Happy gardening!
Tip: Try mixing some ground cinnamon in with your seed starting medium. It helps prevent damping off, the insect pests don’t like it, and it won’t harm your seedlings. Plus, it smells good every time you water your seeds.
Great post. Very informative. I’m a numbers person too, what was your success rate with the eggshells and your seedlings this year?
Great post, very informative. I am also a numbers person. What was your success with the egg shells this year?
Cheryl, that’s a great question! I was actually thinking about adding an update to this post to share my numbers for this year. So thanks for asking. 😉
It’s not quite comparing apples to apples because I used the same seed packets that I bought last year. So basically, I’m using old seeds this year and I didn’t know how much that would affect their viability.
And I only planted four kinds of seeds this time, all using egg shells rather than doing any without.
But here’s how they did:
Green Onions: 16 out of 24 – 67% germination
Radishes: 16 out of 16 – 100% germination
Lettuce: 7 out of 12 – 58%
Chives: 0 out of 24 – 0% (yikes, these old seeds did not want to sprout)
As you can see, I had a wide range of success/failure with 2-year-old seeds. But overall, I’m still very happy with how the egg shells worked! This week has been the process of hardening up the seedlings by taking them outside a few hours each day.
I’ll be transplanting them and planting more seeds directly in my raised beds this weekend. Such a fun hobby to keep the mind on happy and peaceful things!
Did you plant any seeds yet? I’d love to hear your numbers if you have them!
I just have plastic egg cartons. Would those work?
Reg, I think you can get away with that IF you don’t put any part of the plastic egg carton into the ground when you transplant the seedlings. You’d have to carefully slip the baby plant- egg shell and all- out of the carton.
If that’s what you have available, I say give it a try and let me know how it goes!!!
Did you poke holes in the bottom of the egg shells before planting your seeds? I ask this question because I was wondering about drainage issues. Thank you!
Hey Tina, I do not poke holes in the egg shells- it actually helps the seedlings hold moisture longer in a good way! When it’s time to transplant them outside, that’s when I’ll crack the egg shell a little more to ensure the roots can get through and into the ground. Hope that helps!
Would duck egg shells work the same?
Most definitely! I say give them a try, Carice! ?
Do you have suggestions if we were to put the plants outdoors? Would you still suggest finding a warm/sunny location and using the plastic tote? Would the heat from the sun be enough?
Hi Miranda, that’s a good question. In my experience, I haven’t had any luck putting my plastic tote outside once the seedlings have sprouted. In fact, when I’ve tried, the sun has been too much for them and shriveled the baby plants within hours. So I recommend keeping them inside until it’s past the chance of frost where you live. Then you can transplant them into the ground and safely stop using the plastic covering.
Can I use this process for planting outside?Seeing that March is already over?
I’m thinking that I might have missed starting indoors. Let me know please.
Your process seems so good. Thanks
Hi Toey, you want to check when you’re past the danger of frost where you live before you plant directly outside. Here in Missouri, that’s mid to late April. You can put your zip code in on this site and it’ll give you all the info you need: https://davesgarden.com/guides/freeze-frost-dates/
That being said, when it’s not too early to plant outside, you most definitely could use this same technique to plant your seedlings directly into the ground, but I’d skip the cardboard egg cartons.
When you go to plant outside. Do you take egg shell and all and plant in the ground? Thank you.
Nicole, yes, I sure do! 🙂 Even some of the cardboard egg carton goes in the ground- because by the time I transplant, the cardboard is really easy to tear from all the watering. I’ll just gently rip apart the carton to transplant each seedling when it’s time. Hope that helps!
I going to line egg cartons with cupcake ? paper.
Oooh, that sounds like a great idea too, Faye. Another item a lot of us have on hand at home. You’ll have to let us know how it goes!
Such a great tutorial! I’m curious if you poked holes in the bottom of the egg shells as well!?
Thanks, Sonja! Nope, I didn’t poke any holes in the egg shells, so that’s one less thing to do. 😉 I think maybe the seeds grew better with the egg shells not just because of the additional nutrients but because they held moisture longer.
Can I use fresh coffee grounds or do they need to be used?
That’s a good question, Teresa. I’ve only used coffee grounds that have been used, but I think fresh would be fine too. However, if you’re buying coffee grounds just for starting your seeds, I’d save your money and just use dirt.
Thank you for these great tips!! I planned on planting today but now I’ll wait a few days and will be making lots of eggs until then!????
LOL, it’s a great excuse to make omelettes! Good luck with your seeds in a few days. ?
Great advice. I’ve only grown vegetables from started plants. They did great. But it’s expensive. So this year I’m starting them from seeds. Thanks
That’s wonderful- good luck with your veggies this year!
Thank you for sharing your success with egg shells as I had been saving my shells for this same purpose! I just love the Spring look of green seedlings, dirt and all in an egg … beautiful!
You are so very welcome, Priscilla. Your note is actually quite timely because I’ve been itching for Spring and I just started my indoor seeds this weekend. I’m hoping for the same success with egg shells this year too! Good luck with your seedlings and happy planting!
I love the fact that you gave the stats for your method. Those stats were impressive! Beautifully explained!
Thank you, Laurie! I’m a numbers gal so you better believe I’ll be tracking my seeds again this year. 😉
I’ve been saving up cardboard egg cartons and extra shells every time we cook eggs this winter too. I cant wait for indoor planting time in February/March!